
 Distribution PL · 4REF
Wipcool BV100B user manual
Read the entire manual before first use. Keep it for as long as you use the device.
Wipcool BV100B user manual
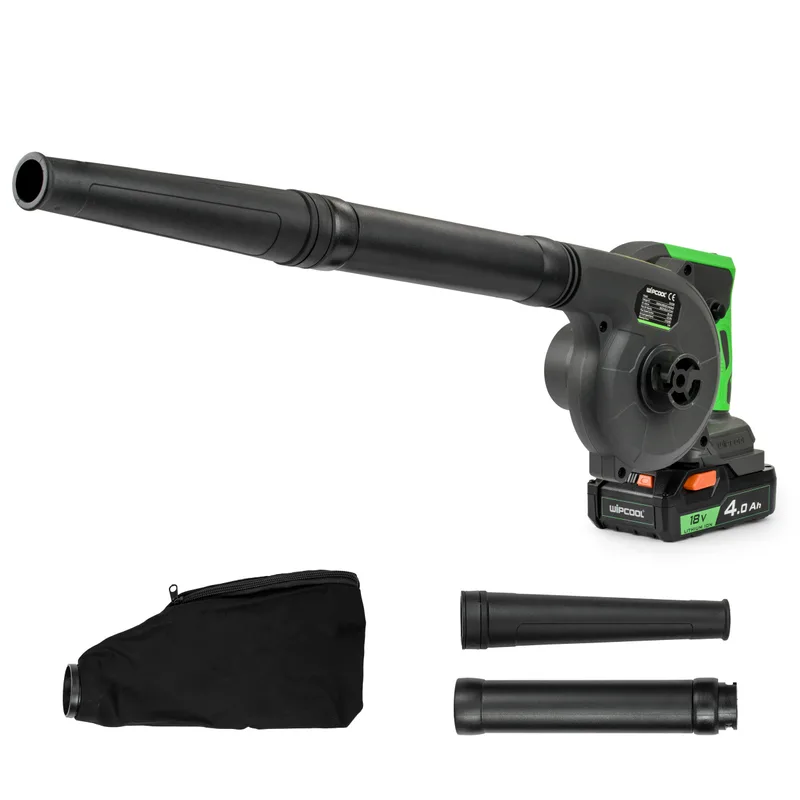
The Wipcool BV100B Cordless Blower is used to blow away dust, fine particles and light debris during service, installation and cleaning work, including from hard-to-reach areas. It also dries surfaces and coils after cleaning air conditioners. In vacuum mode, it picks up light, dry waste.
The user manual is an integral part of the product. Please read this manual carefully and follow all instructions closely.
General information
Wipcool products are designed for professional use by qualified air conditioning and refrigeration engineers. As the manufacturer, Wipcool stipulates that our devices should only be operated by people with the appropriate qualifications and training.
- ■Follow all local safety regulations and general safety standards when using the Wipcool BV100B blower.
- ■Keep the user manual near the device so that personnel can access it easily at all times.
- ■Before use, qualified personnel should read the user manual carefully and understand all the instructions it contains.
- ■The manufacturer accepts no liability for any damage resulting from improper use, failure to follow the user manual, lack of personnel qualifications or any unauthorised modifications to the device.
- ■The general terms and conditions of sale contained in the sales documents apply.
Symbols and conventions
Signs and markings used on the device and in the manual:
- 01
 Warning - read the text in the box next to the symbol.
- 02
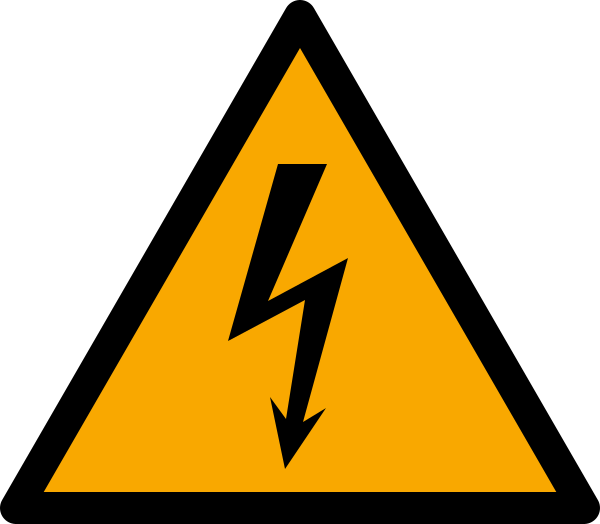 Dangerous voltage - risk of electric shock.
- 03
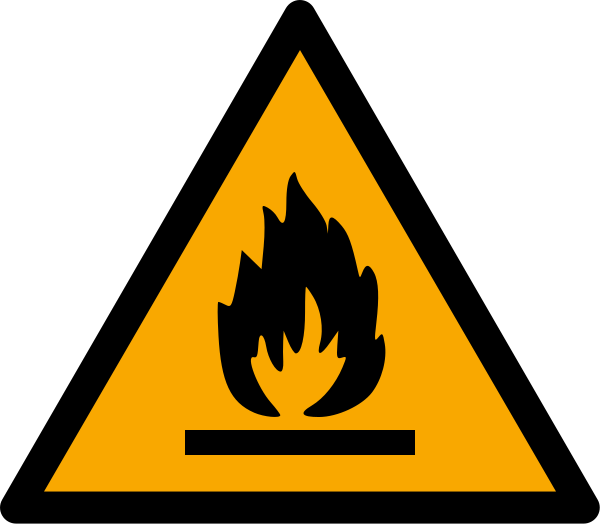 Flammable materials. Risk of fire or explosion.
- 04
 Notice - risk of damage to the device or an incorrect result.
- 05
 Indicates that the product meets the health, safety and environmental standards applicable in the European Union.
- 06
 Do not dispose of the blower with household waste.
Safety information
Operator and surroundings
- ■Do not allow children, people with reduced physical, sensory or mental capabilities, or people lacking experience, knowledge or familiarity with the instructions to operate the device. Observe local restrictions on the operator's age.
- ■Do not operate the device when bystanders, especially children, or animals are nearby. The operator is responsible for the safety of people and property nearby.
- ■Work in daylight or good artificial lighting.
- ■Maintain a stable position and secure footing, and do not overreach.
- ■Avoid prolonged operation at low temperatures.
Clothing and protective equipment
- ■Wear closed, non-slip safety footwear and long trousers. Do not wear loose clothing or jewellery that could be drawn into the suction inlet. Keep long hair away from the suction inlet and cooling air inlets.
- ■Always wear safety glasses that meet EN 166 requirements. Wear a dust mask when working in dusty conditions.
- ■Choose protective equipment appropriate to the working conditions; wear a safety helmet and hearing protection when necessary. The employer should ensure that the operator and people in the immediate vicinity use appropriate protective equipment.
Operating rules
- ■Do not blow or vacuum up hazardous objects such as nails, glass fragments and blades.
- ■Do not direct the air stream at people, animals, flammable materials or delicate surfaces.
- ■Keep the cooling air inlets clean.
- ■Do not block the suction inlet or air outlet, and do not insert fingers or other objects into them.
- ■Use only Wipcool nozzles and accessories, batteries and adapters intended for this model. Do not use the blower to inflate balls, inflatable boats or similar items.
- ■Make sure the device is switched off before picking it up or carrying it. Do not carry the device with your finger on the trigger.
If the device strikes a foreign object or starts making unusual noises or vibrating, switch it off immediately and remove the battery. Check for damage. If damaged, do not resume work until it has been repaired. Have it repaired by the service centre - submit a service request at wipcool.pl/serwis.
Technical specifications
Device diagram
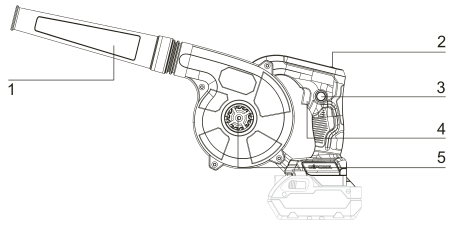
| No. | Name |
|---|---|
| 1 | Blower nozzle |
| 2 | Speed control |
| 3 | Trigger lock |
| 4 | Trigger |
| 5 | Suction inlet |
Package contents
- ■BV100B blower with blower nozzle.
- ■Extension tube.
- ■Waste bag.
- ■Accessory bag.
After unpacking, check that the package is complete and in good condition. Report any missing items or transport damage to the seller.
The battery and charger are not included. Adapters for batteries from other brands are sold separately.
Transport and storage
Transport
- ■Switch off the device and remove the battery before transport. Carry the blower in the accessory bag and secure the blower nozzle, extension tube and waste bag against movement.
- ■Protect the device from drops, strong shocks and pressure that could damage the housing, trigger, speed control, suction inlet or battery slot.
- ■Protect the blower from moisture, dust, precipitation and direct exposure to high temperatures.
Storage
- ■Store the blower in a dry, clean and well-ventilated place, away from sunlight and heat sources. Avoid places exposed to moisture, dust and corrosive, flammable or chemically aggressive substances.
- ■Remove the battery from the device before prolonged storage. Protect the blower nozzle, waste bag and suction inlet from deformation and dirt.
Assembly
Before starting work, check that the housing, trigger, blower nozzle, extension tube, waste bag and other components are undamaged. Also check that the accessories, suction inlet, air outlet and air passage are clean and unobstructed. Do not use a damaged device or damaged accessories; replace damaged components before using them again.
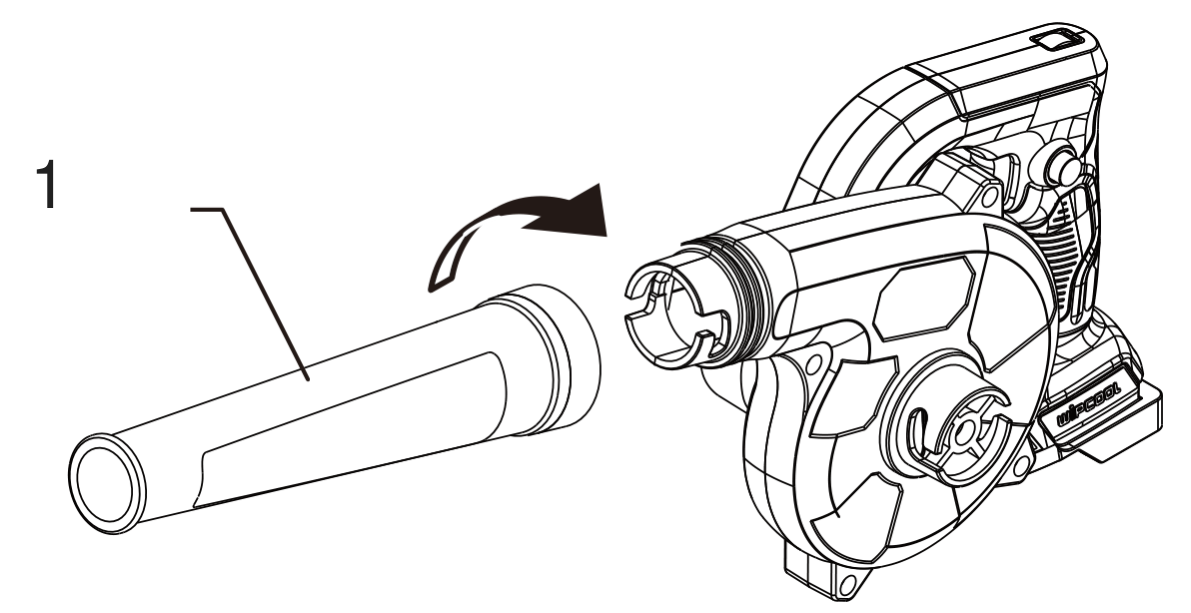
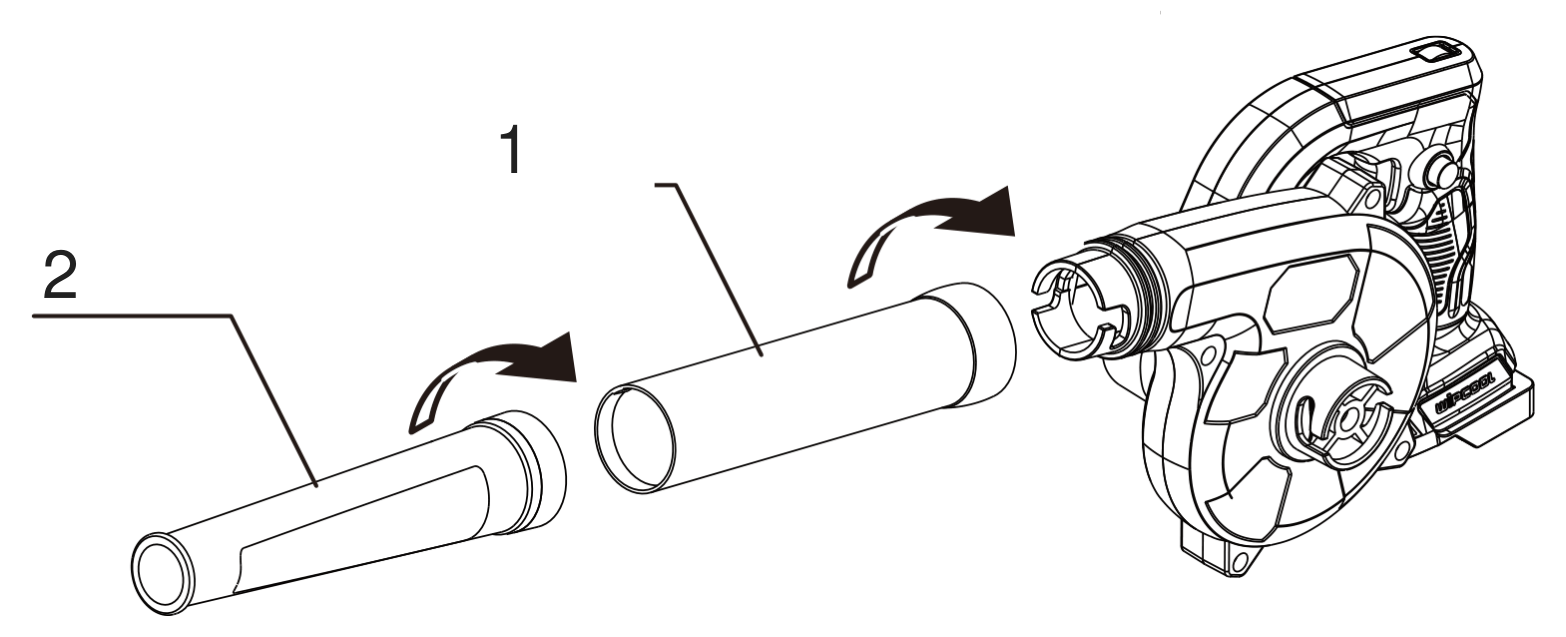
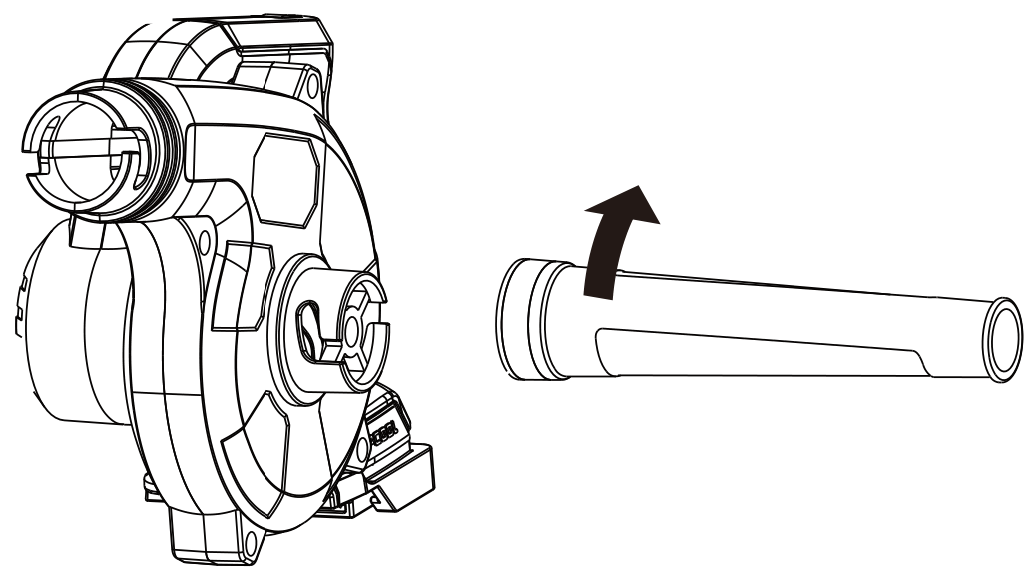
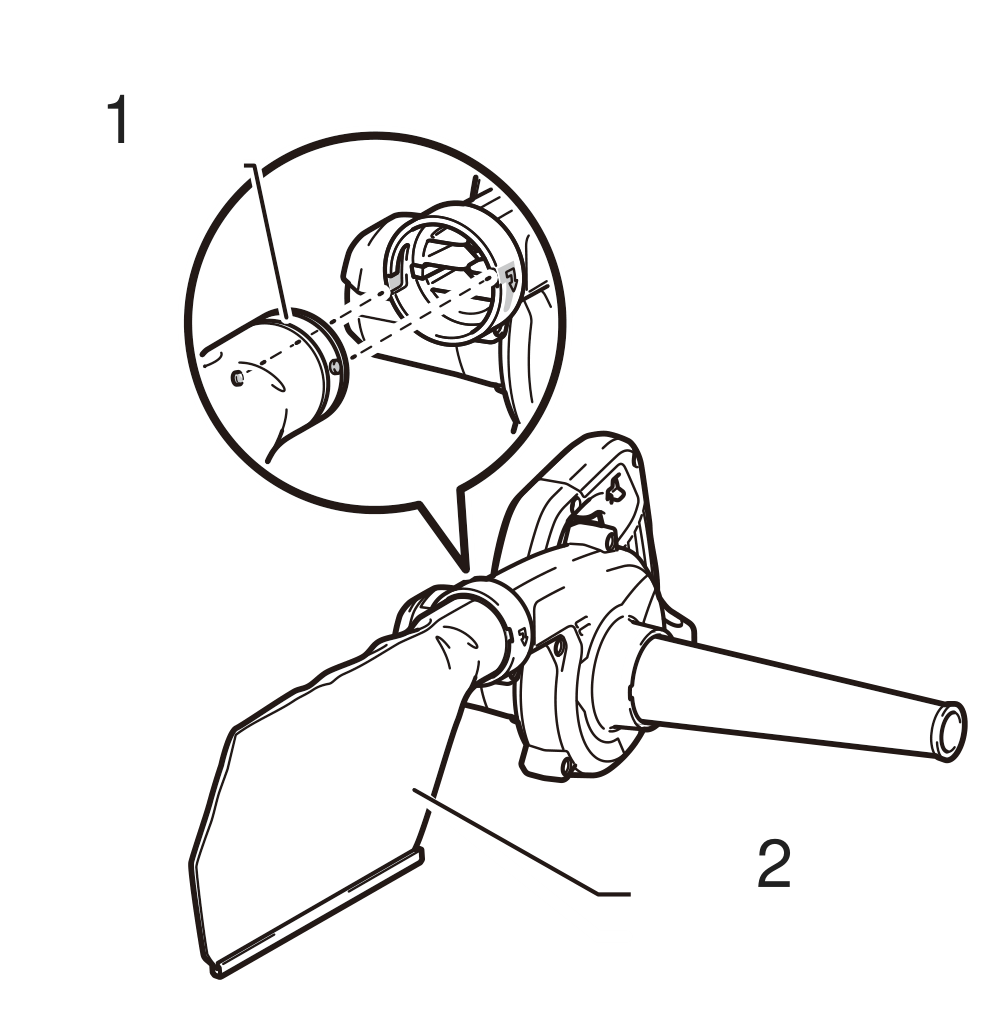
When changing modes, remove the accessories currently fitted. To fit accessories, align the tabs with the grooves in the fitting, insert the component and turn it until it locks.
Blower mode
The waste bag must be removed in blower mode.
- 01If using the extension tube, attach it to the air outlet.
- 02Attach the blower nozzle to the extension tube or directly to the air outlet.
Vacuum mode
- 01Attach the blower nozzle to the suction inlet, the opening through which air is drawn in.
- 02Attach the waste bag connector to the air outlet.
Remove the accessories in reverse order.
Before starting, check that all accessories are securely attached and, in vacuum mode, that the waste bag is clean and correctly fitted.
Battery
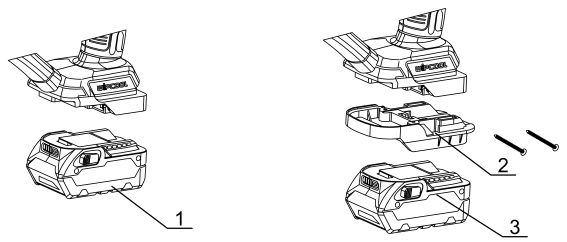
The device has an AEG/RIDGID 18 V interface. If using a battery from another brand, first fit a compatible adapter in the device's battery slot (figure 6). After fitting the accessories, insert the battery into the device's battery slot or adapter and check that it is correctly seated and locked.
How to use
Speed adjustment
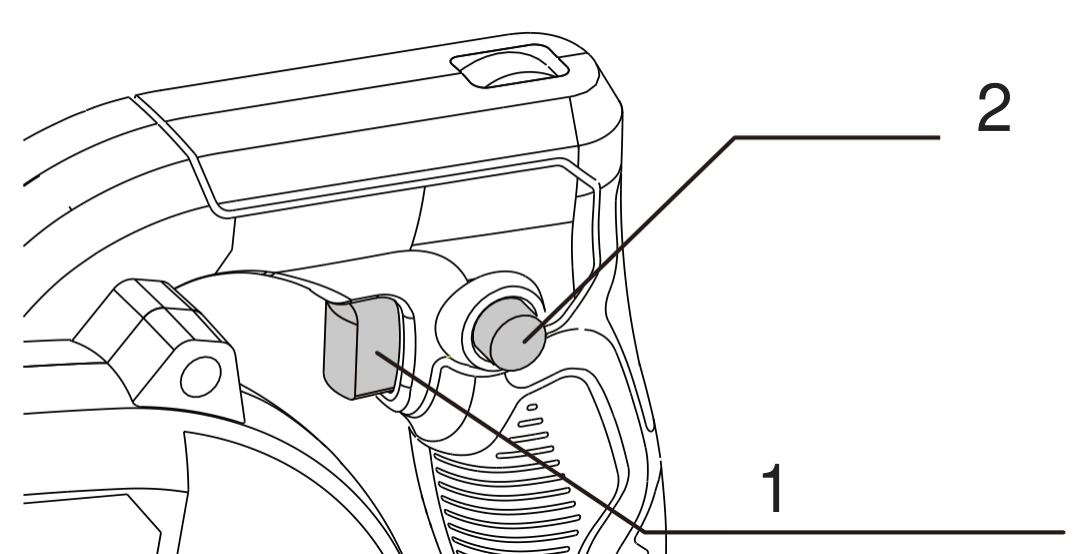
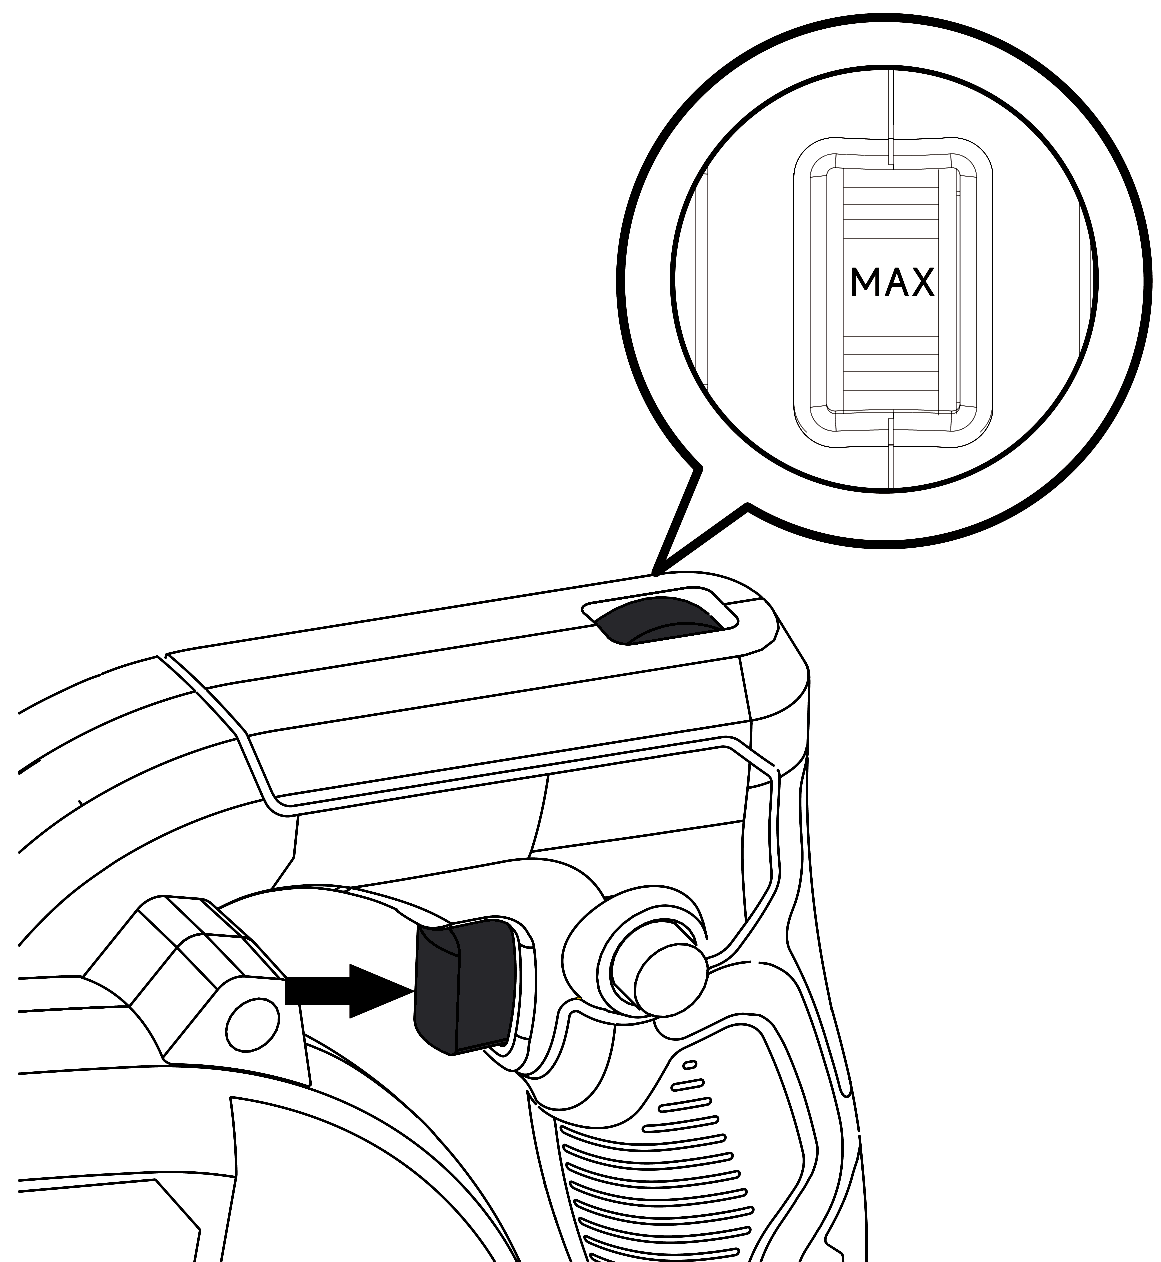
Set the speed control to a value from 1 to 6. Turning it towards 6 increases the speed, and turning it towards 1 reduces it. Select lower settings for light debris and work requiring greater control; higher settings increase the blowing or suction force.
Using the trigger and continuous operation
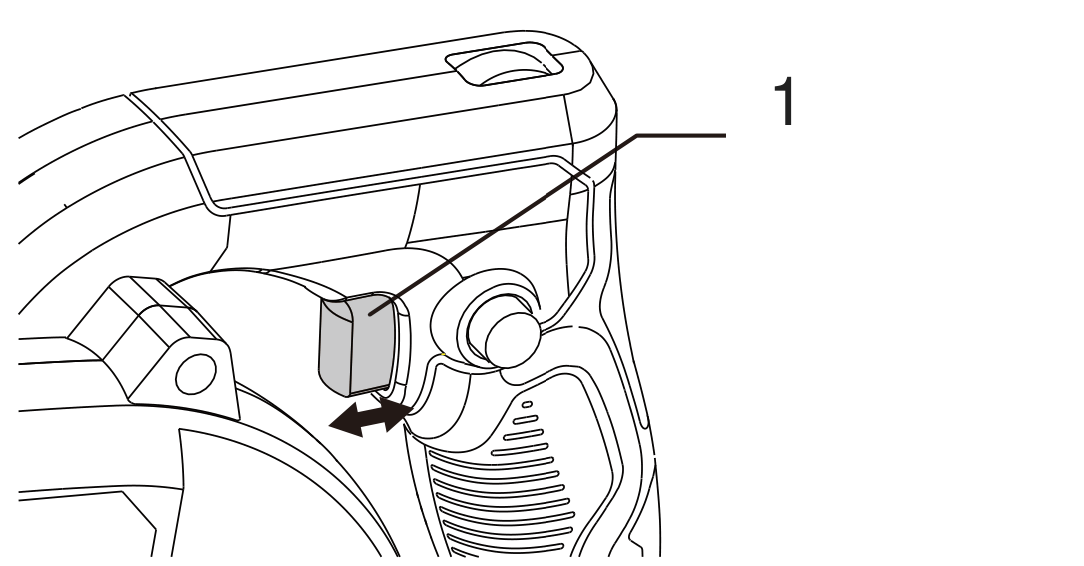
- 01Press the trigger to start the device. Pressing the trigger further increases the speed; releasing the trigger stops the device.
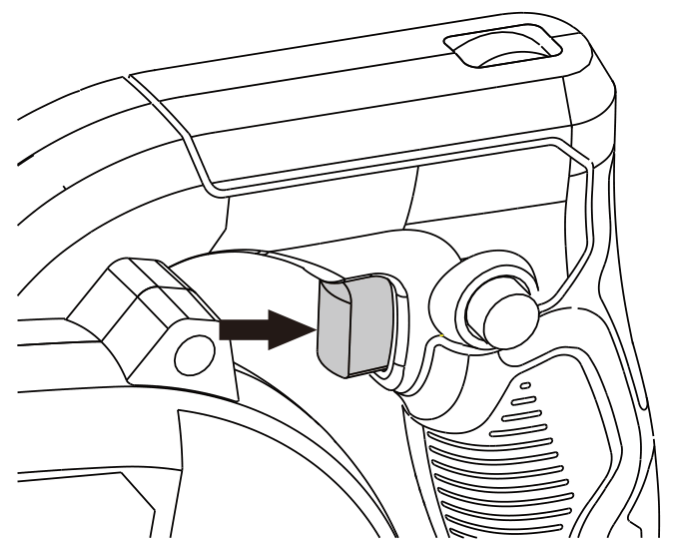
- 02To start continuous operation, hold the trigger and briefly press the trigger lock at the same time. Then release the trigger.
- 03To stop continuous operation, briefly press the trigger. The device will stop and the trigger lock will be released.
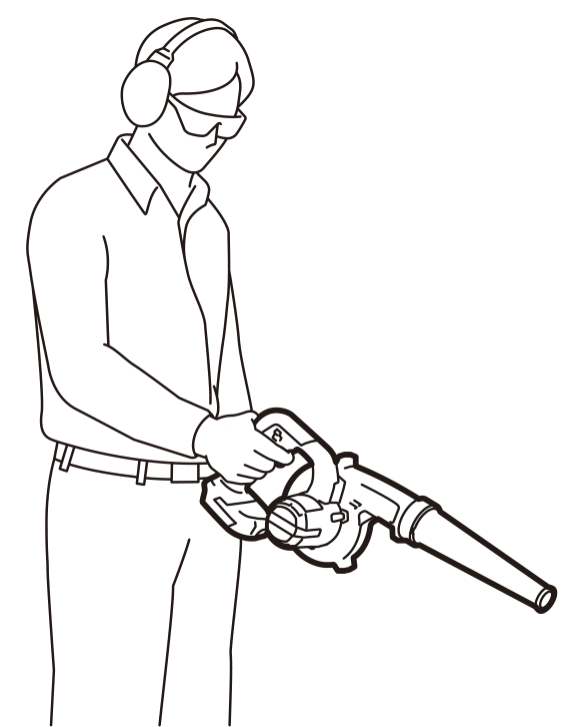
Operating in blower mode
Hold the device firmly with one hand and direct the air stream slowly. Near walls, corners, equipment or vehicles, direct the air stream so that it does not cause damage or scatter debris.
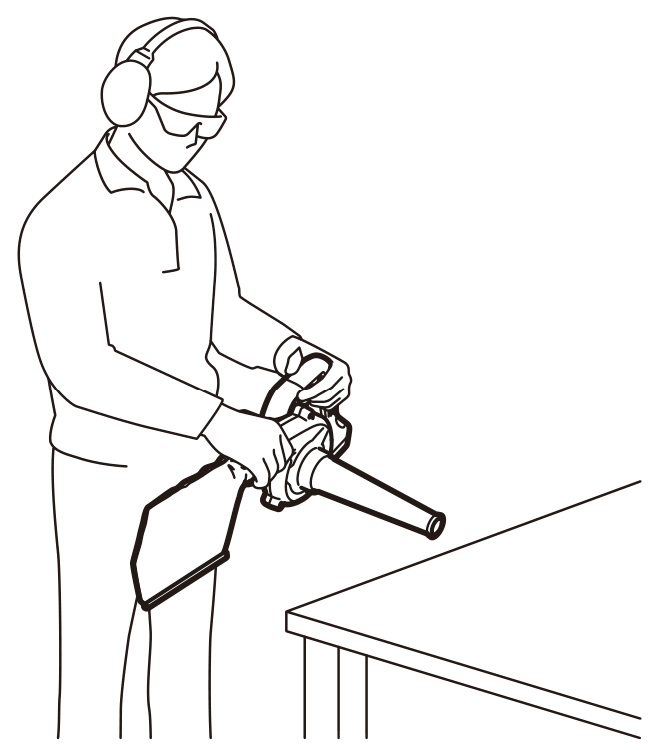
Operating in vacuum mode
Check the waste bag frequently for wear or damage; do not use a damaged waste bag. Check how full it is and empty it before it overfills. An overfilled waste bag restricts airflow and puts strain on the device.
Hold the device with both hands. Adjust the suction force to the location and working conditions by varying the pressure on the trigger.
Finishing work
- 01Release the trigger or, if the trigger lock is engaged, briefly press it. Wait for the device to stop completely.
- 02Remove the battery and detach the accessories.
- 03Clean the device and the accessories used.
Maintenance
Cleaning
Do not immerse the blower in water or other liquids, and do not wash it with a pressurised water jet.
- 01Remove dust and dirt from the blower nozzle and extension tube. If the waste bag was used, empty it and remove any dust.
- 02Remove dust from the housing with a dry cloth or a cloth dampened with soapy water and thoroughly wrung out.
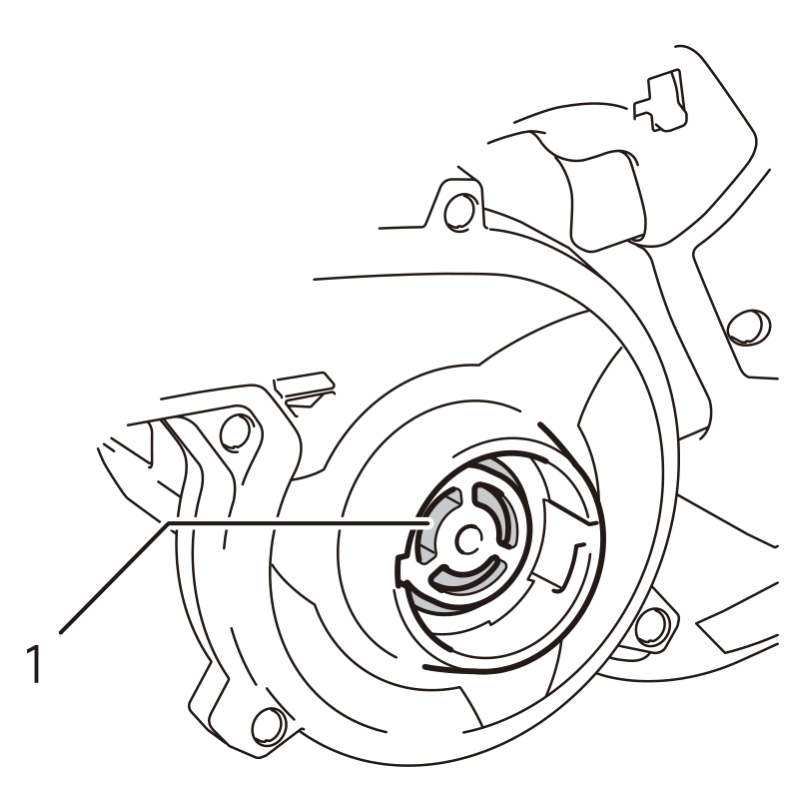
- 03Remove dust and dirt from the suction inlet shown in figure 13. Check the air passage for foreign objects restricting the flow.
- 04Check the condition of the contacts in the blower's battery slot. If necessary, remove dirt with a dry cloth.
Inspection after cleaning
Check that the device and accessories are undamaged, fit the accessories and make sure they are correctly seated. Then insert the battery and check that the blower works.
Repairs
Repairs, other maintenance and adjustments are carried out by the service centre. Have repairs carried out by the service centre - submit a service request at wipcool.pl/serwis. Use Wipcool spare parts. Do not dismantle the device yourself.
Troubleshooting
If the airflow weakens, the device becomes excessively hot or switches off during operation, stop using it. Switch off the device and remove the battery. Once the moving parts have stopped, check that the suction inlet and air outlet are unobstructed.
If the problem is not described in the table, stop using the device. Have it repaired by the service centre - submit a service request at wipcool.pl/serwis.
| Problem | Possible cause | Solution |
|---|---|---|
| Motor does not start | Battery not inserted | Insert the battery. |
| Motor does not start | Battery discharged | Insert a charged battery. |
| Motor does not start | Drive system malfunction | Have the device repaired by the service centre - submit a service request at wipcool.pl/serwis. |
| Motor stops after a short time | Battery discharged | Insert a charged battery. |
| Motor stops after a short time | Overheating | Stop using the device and allow it to cool. |
| Device does not reach maximum speed | Battery inserted incorrectly | Insert the battery correctly. |
| Device does not reach maximum speed | Battery discharged | Insert a charged battery. |
| Device does not reach maximum speed | Drive system malfunction | Have the device repaired by the service centre - submit a service request at wipcool.pl/serwis. |
| Unusual vibration | Drive system malfunction | Stop the device immediately. Have it repaired by the service centre - submit a service request at wipcool.pl/serwis. |
| Motor does not stop | Electrical or electronic fault | Remove the battery immediately. Have the device repaired by the service centre - submit a service request at wipcool.pl/serwis. |
Waste electrical and electronic equipment
- 01The crossed-out bin symbol means that the device must not be disposed of with other waste at the end of its life.
Under the applicable regulations on waste electrical and electronic equipment, products marked with the separate collection symbol must not be disposed of with other municipal waste. Because they contain harmful substances, electronic products that are not collected separately may be hazardous to the environment and human health. Proper separate collection of waste electrical and electronic equipment prevents negative effects on the environment.
By taking waste equipment to a collection point, the user contributes to its reuse, recycling and recovery.
Recycling - one method of protecting the environment. The process of recovering substances from waste that can be reused as raw materials.
Waste recovery - the use of waste that has lost its useful value, such as plastics, paper and cardboard, as secondary raw materials; the term is also commonly used to mean its destruction.
Information on the waste electrical and electronic equipment collection system
- ■Waste electrical and electronic equipment must not be disposed of with other waste.
- ■The collection of incomplete electrical and electronic equipment and parts from waste equipment is prohibited.
- ■A distributor supplying equipment intended for households to a purchaser must collect waste household equipment free of charge at the place of delivery, provided that the waste equipment is of the same type and performs the same function as the equipment supplied.
- ■The user may hand over waste equipment to a waste equipment collector, a treatment facility or a municipal waste collector in the municipality.
- ■Information on collection points is available on the Public Information Bulletin (BIP) websites of regional marshal's offices and city and municipal offices.
Service and documents
Before submitting a service request, have the following ready:
- ■Model - shown on the device nameplate and on the invoice.
- ■Serial number - if there is none, provide the production number (e.g. 11/2025), usually found on the underside of the device.
- ■Proof of purchase - an invoice or receipt from an authorised distributor.
- ■Description of the fault - what is happening, when it started and under what conditions.
You can submit a service request at wipcool.pl/serwis. You will also find the warranty terms there.