
 Distribution PL · 4REF
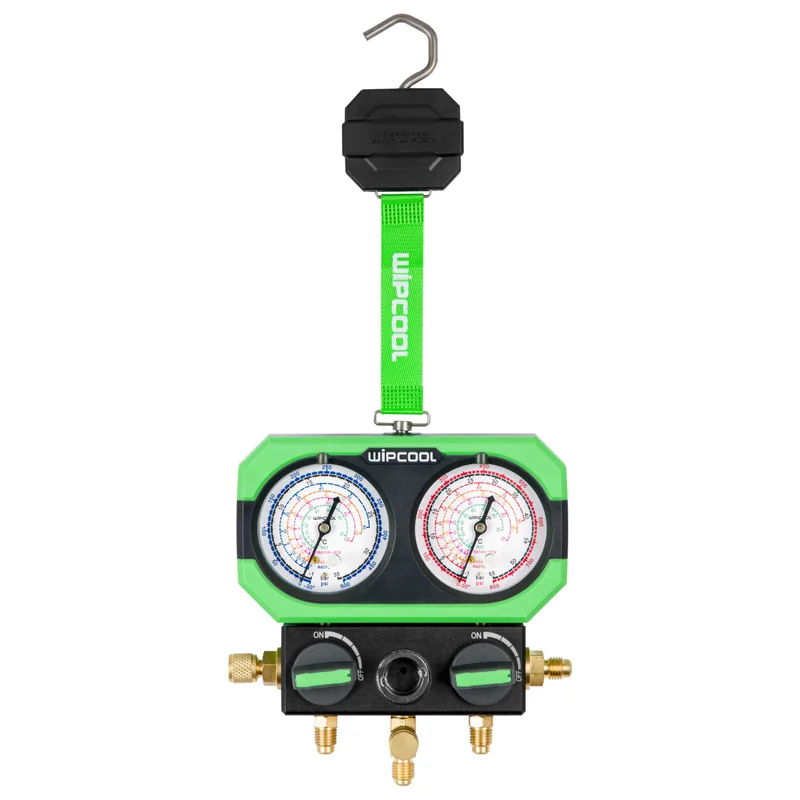
Wipcool MG68-2K / MG68-2KE user manual
The Wipcool MG68-2K and MG68-2KE analogue manifold gauge sets are used to measure pressure, evacuate and charge refrigeration and air conditioning systems. The gauge scales show the evaporation temperature corresponding to the pressure of the refrigerant in use.
The user manual is an integral part of the product. Please read this manual carefully and follow all instructions strictly.
General information
Wipcool products are designed for professional use by qualified air conditioning and refrigeration engineers. As the manufacturer, Wipcool stipulates that our equipment should only be operated by suitably qualified and trained persons.
- ■Observe all local safety regulations and general safety standards when using the Wipcool MG68-2K / MG68-2KE manifold gauge set.
- ■The user manual should be kept near the device so that personnel can access it easily at any time.
- ■Before use, qualified personnel should read the user manual carefully and understand all instructions it contains.
- ■The manufacturer accepts no liability for any damage resulting from improper use, failure to follow the user manual, lack of personnel qualifications or any unauthorised modifications to the device.
- ■The general terms of sale contained in the sales documents apply.
Symbols and conventions
Symbols used in boxes in the manual:
- 01
 Warning - read the text in the box next to the symbol.
- 02
 Low temperature - contact with refrigerant can cause frostbite.
The psi and inHg markings correspond to additional pressure scales on the gauge dials.
Safety information
If refrigerant gets into your eyes, immediately rinse them with plenty of water and consult a doctor.
- ■Use only the refrigerants listed on the manifold gauge set.
- ■Protect the gauges from harmful and corrosive substances, especially ammonia.
- ■Protect the set from vibration and drops during use and transport.
- ■Do not use excessive force when opening or closing the valves - you may damage the seal.
- ■Do not release refrigerant into the atmosphere. Recover residual refrigerant from the hoses and manifold gauge set using a refrigerant recovery machine.
Technical specifications
| Parameter | MG68-2K | MG68-2KE |
|---|---|---|
| Refrigerants | R22, R410A, R32, R404A, R407C | R22, R410A, R32, R404A, R407C |
| Connections | 3 × 1/4" SAE | 3 × 1/4" SAE |
| Gauge diameter | 60 mm | 60 mm |
| Low-side gauge range | approximately -1–34.5 bar (scale: -30 inHg to 500 psi) | approximately -1–34.5 bar (scale: -30 inHg to 500 psi) |
| High-side gauge range | approximately -1–55 bar (scale: -30 inHg to 800 psi) | approximately -1–55 bar (scale: -30 inHg to 800 psi) |
| Hose length | 3 × 1.5 m | 3 × 1.2 m |
| Storage temperature | -20–+60 °C | -20–+60 °C |
Device diagram
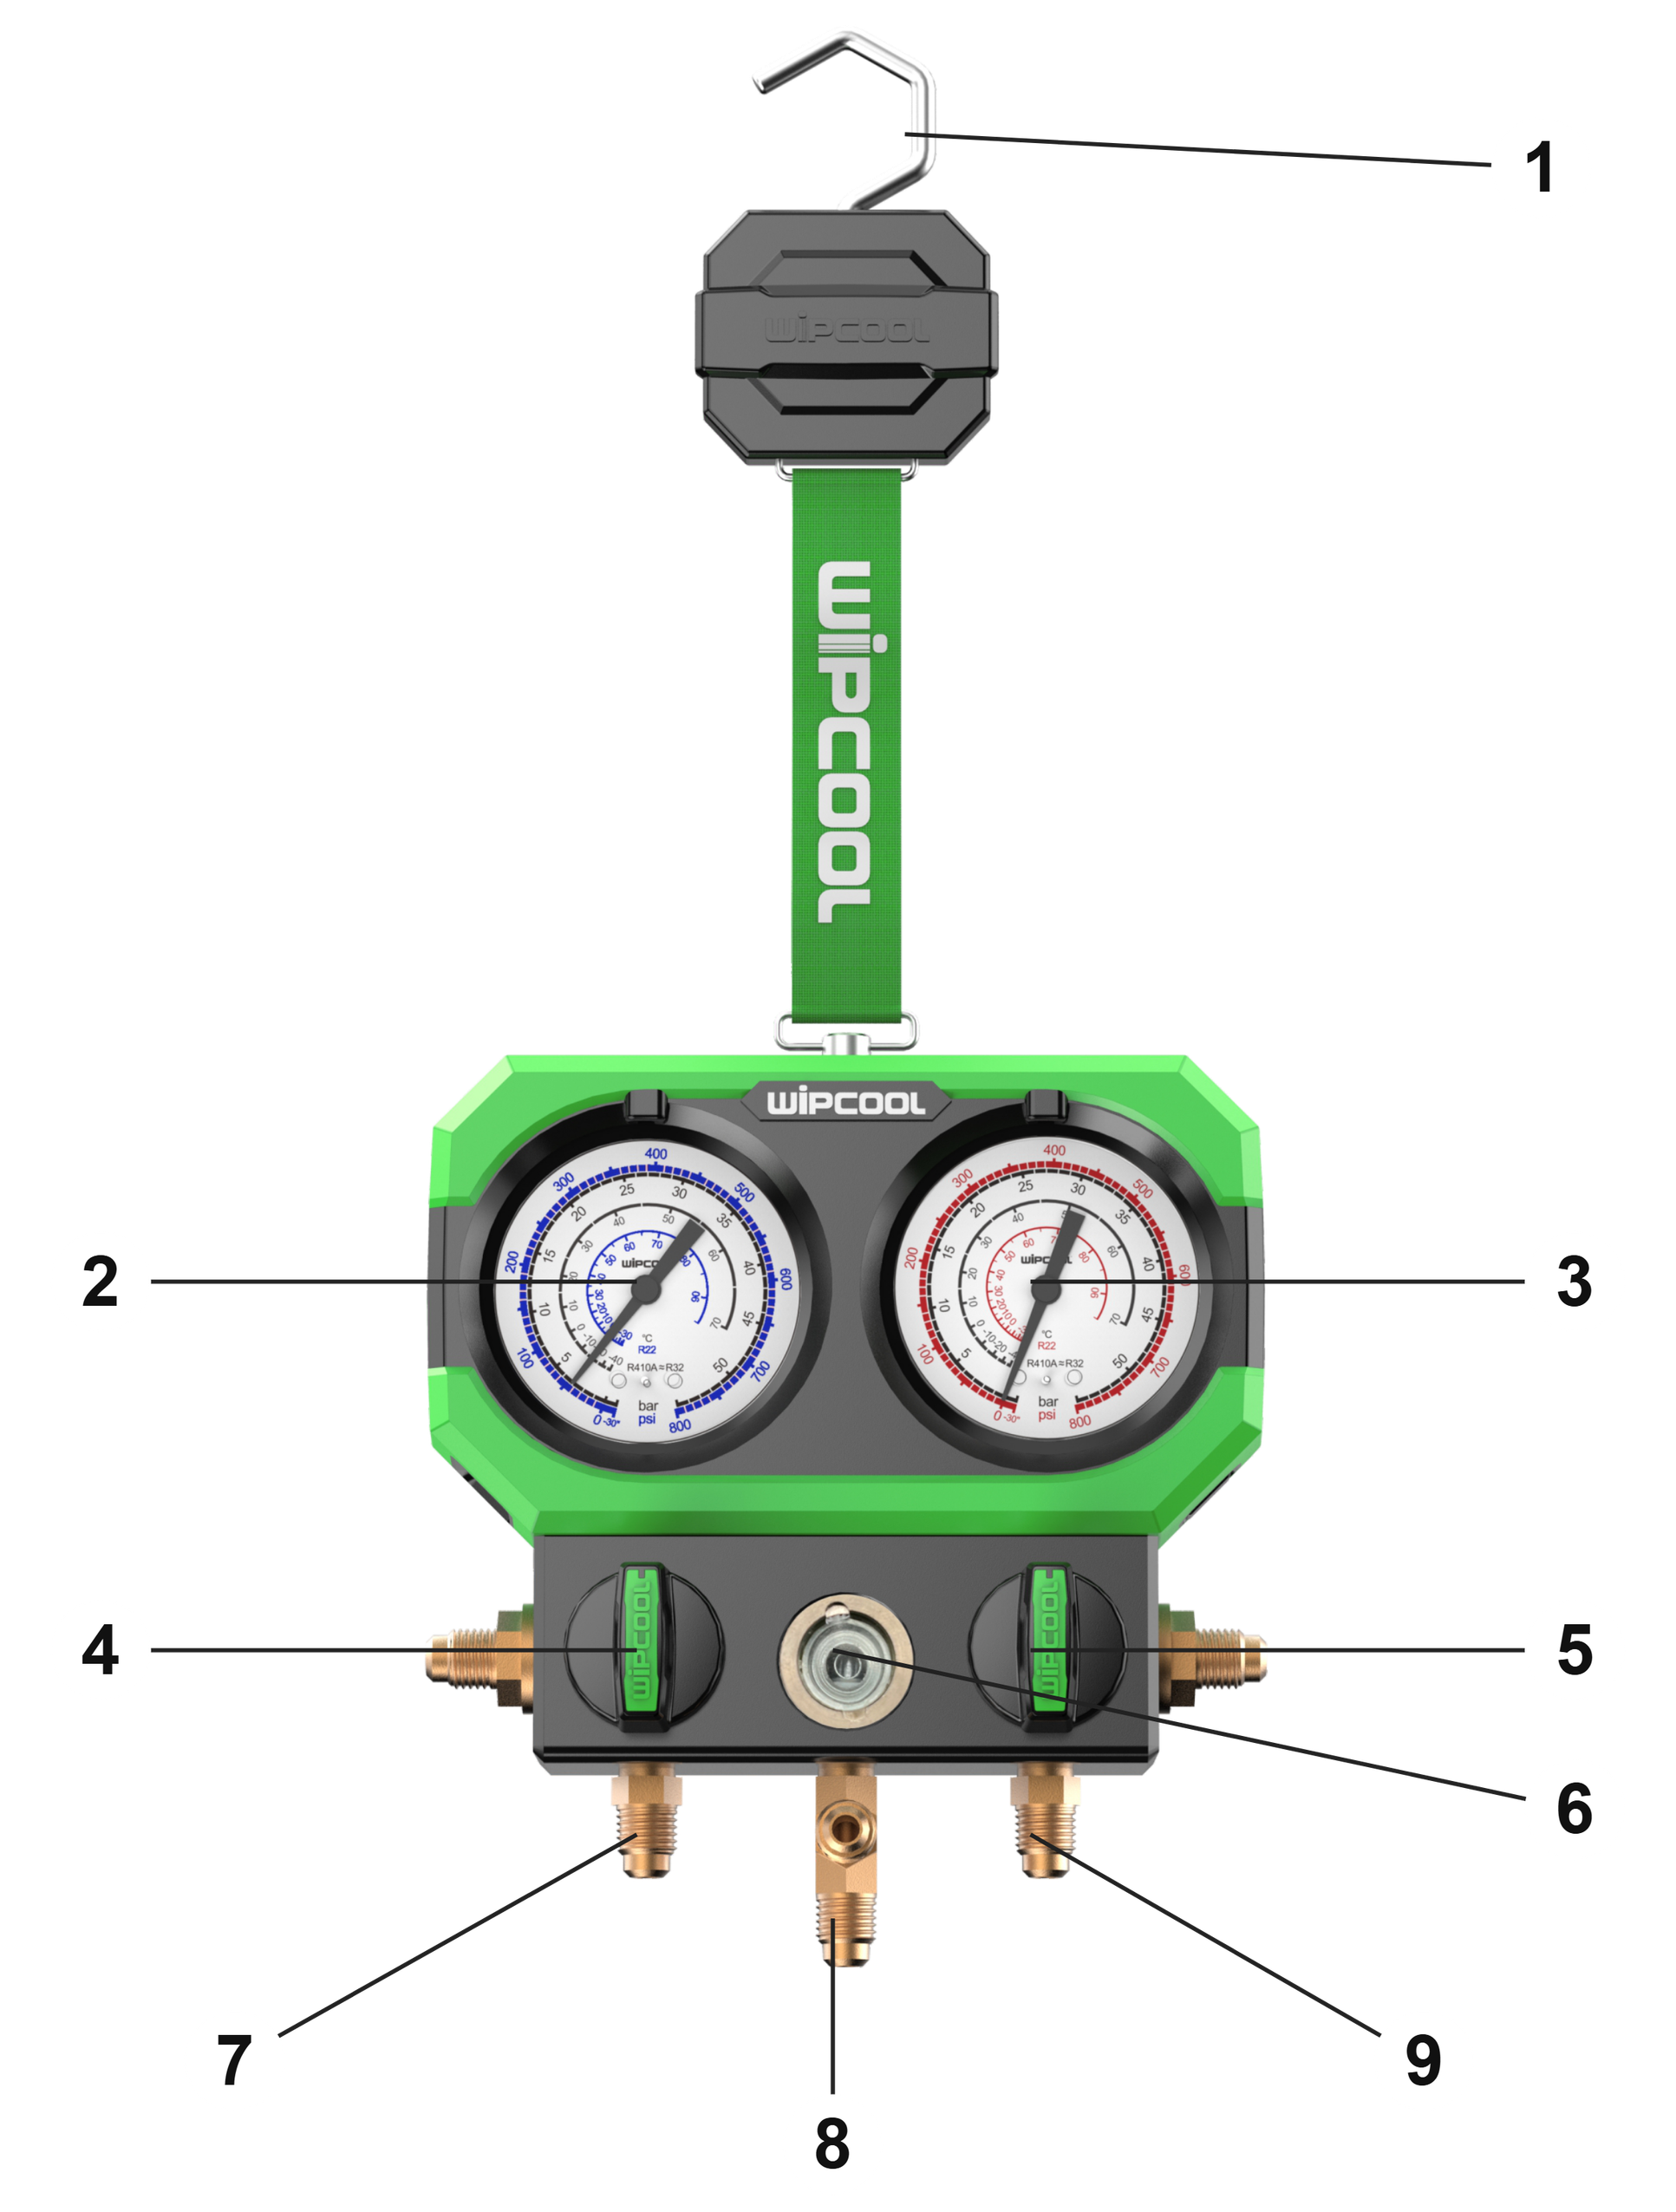
| No. | Component |
|---|---|
| 1 | Hook |
| 2 | Low-side gauge |
| 3 | High-side gauge |
| 4 | Low-side valve knob |
| 5 | High-side valve knob |
| 6 | Sight glass |
| 7 | Low-side hose connection |
| 8 | Centre connection (yellow hose) |
| 9 | High-side hose connection |
Package contents
| Item | MG68-2K | MG68-2KE |
|---|---|---|
| Analogue manifold gauge set | 1 | 1 |
| Charging hoses: red, yellow and blue | 3 × 1.5 m | 3 × 1.2 m |
| 5/16" - 1/4" adapters | 2 | Not included |
| Bag / case | Bag | Case |
| User manual | 1 | 1 |
After unpacking, check that the set is complete and in good condition. Report any missing or damaged items to the seller.
Transport and storage
- ■Transport the set in its original packaging.
- ■Store the set in a dry place, away from direct sunlight and heat sources, at a temperature of -20–+60 °C.
Connection
Before each use, check the condition of the hoses and replace them if necessary. Check that the yellow hose seal is present and that both gauges read zero before connecting the set to the system.
- ■The blue hose connects the low-side hose connection to the system's low-side service port.
- ■The red hose connects the high-side hose connection to the system's high-side service port.
- ■The yellow hose connects the centre connection to the vacuum pump during evacuation or to the refrigerant cylinder during charging.
Operation
Measuring pressure
- 01Close both valves on the manifold gauge set. Connect the blue hose to the system's low-side service port and the red hose to the high-side service port.
- 02Start the system and read the pressure on the low-side and high-side gauges. After taking the readings, switch off the system.
Evacuating the system
- 01Connect the blue and red hoses to the system's service ports as described in the ‘Connection’ section, and connect the yellow hose to the vacuum pump.
- 02Open the low-side and high-side valves, then switch on the vacuum pump.
- 03Monitor the low-side gauge reading for 3–5 min. Once the required vacuum is reached, close both valves, then switch off the vacuum pump.
- 04For a further 3–5 min, check that the low-side gauge needle remains at approximately -1 bar (-30 inHg on the scale). If it does not, repeat steps 2–3.
Topping up refrigerant
The following steps apply to topping up refrigerant in a system that is already charged.
- 01Close both valves on the manifold gauge set. Connect the blue hose to the system's low-side service port and the red hose to the high-side service port. Start the system and check the pressure on both sides after approximately 5–10 min.
- 02If the pressure is too low, connect the yellow hose to the refrigerant cylinder. Draw R410A, R404A and R407C blends in liquid form: from a cylinder inverted with its valve pointing downwards or from a cylinder with a dip tube.
- 03Open the cylinder valve and purge the yellow hose.
- 04With the compressor running, slowly open the low-side valve and charge refrigerant in small amounts on the suction side. Keep the high-side valve closed. Monitor the amount of refrigerant with a refrigerant charging scale and the pressure on the gauges.
- 05After adding the required amount of refrigerant, close the low-side valve and the cylinder valve, then check the system pressure again. If it is still too low, open the cylinder valve and repeat steps 4–5.
Maintenance
Cleaning
Clean the set with it disconnected from the system and free of refrigerant.
If necessary, wipe the gauge surfaces and copper connections with a damp cloth. You may use a mild detergent. Do not use strong alkaline or acidic detergents.
Calibration
Send the gauges for calibration every 3–6 months.
Service and documents
Before submitting a service request, prepare:
- ■Model - found on the device's nameplate and on the invoice.
- ■Serial number - if there is none, provide the production number (e.g. 11/2025), usually found on the underside of the device.
- ■Proof of purchase - an invoice or receipt from an authorised distributor.
- ■Description of the fault - what is happening, when it started and under what conditions.
You can submit a service request at wipcool.pl/serwis. You will also find the warranty terms there.