
 Distribution PL · 4REF
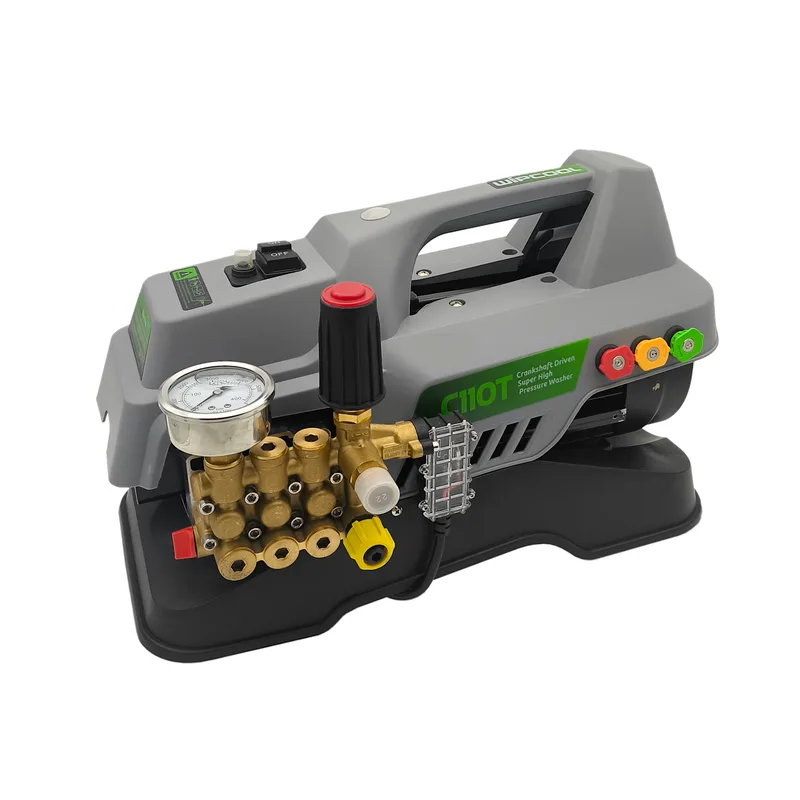
Wipcool C110T user manual
Read the entire manual before first use. Keep it for as long as you use the device.
Wipcool C110T user manual
The Wipcool C110T pressure washer is designed for cleaning work in the air conditioning and refrigeration industry and for industrial applications. It can draw water from a mains supply or an external tank.
The user manual is an integral part of the product. Please read this manual carefully and follow all instructions strictly.
General information
Wipcool products are designed for professional use by qualified air conditioning and refrigeration engineers. As the manufacturer, Wipcool stipulates that our equipment should only be operated by suitably qualified and trained personnel.
- ■Follow all local safety regulations and general safety standards when using the Wipcool C110T pressure washer.
- ■Keep the user manual near the device so that personnel can access it easily at any time.
- ■Before use, qualified personnel should read the user manual carefully and understand all the instructions it contains.
- ■The manufacturer accepts no liability for any damage resulting from improper use, failure to follow the user manual, lack of personnel qualifications or any unauthorised modifications to the device.
- ■The general terms and conditions of sale contained in the sales documents apply.
Symbols and conventions
Symbols and markings used on the device and in the manual:
- 01
 Indicates that the product meets the health, safety and environmental standards applicable in the European Union.
- 02
 Do not dispose of the pressure washer with household waste.
- 03
 Warning - read the text in the box next to the symbol.
- 04
 Dangerous voltage - risk of electric shock.
- 05
 Warning of fire or explosion in the presence of flammable materials.
- 06
 Notice - risk of damage to the device or an incorrect result.
- 07
 Wear eye protection.
- 08
 Wear protective gloves.
Safety information
Before starting work
- ■The electrical connection must comply with local electrical regulations.
- ■Check the device, hoses and connections before each use. Do not use the pressure washer if it is damaged or malfunctioning.
- ■Work in a well-ventilated area. Keep children and bystanders away from the work area.
- ■Do not use the pressure washer when tired or under the influence of alcohol, drugs or medication that impairs your ability to work.
- ■Do not overreach or stand on an unstable surface. Keep proper footing and balance.
Protecting the device
- ■Switch off the pressure washer when the tank is empty. Running the pump dry may damage it.
- ■Use only approved accessories and spare parts. The spray gun and nozzles must be original and compatible with this model.
- ■Do not remove the covers or dismantle the device. Do not repair it yourself.
Technical specifications
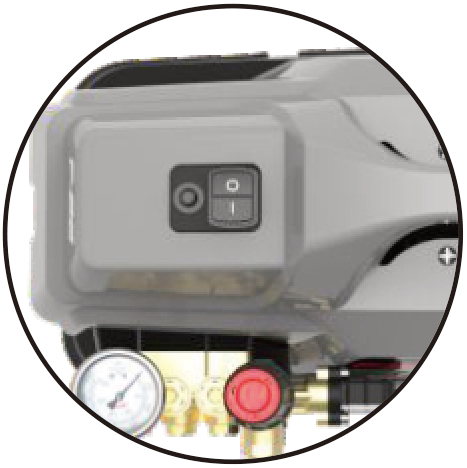
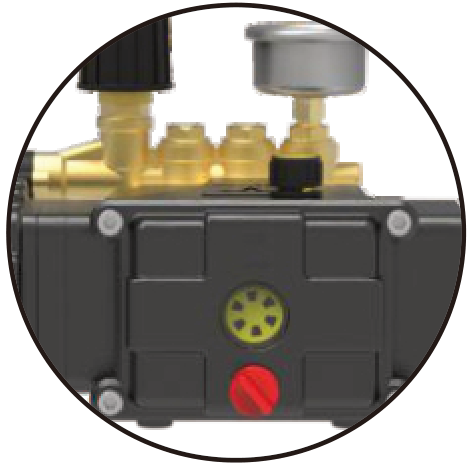
Device diagram
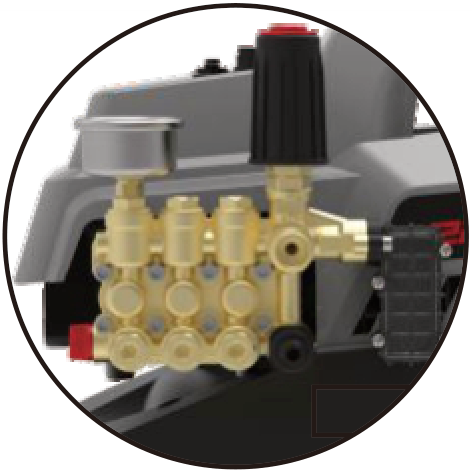
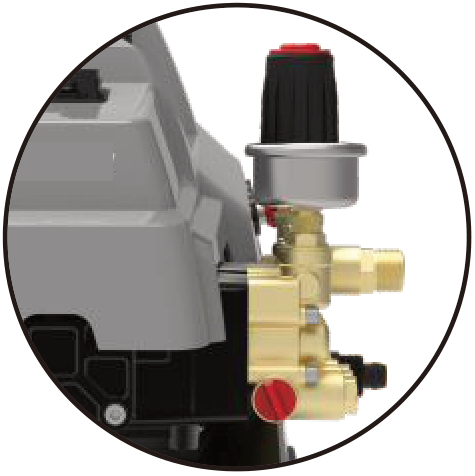
Package contents
- ■C110T pressure washer.
- ■Spray gun and lance.
- ■0°, 15° and 25° nozzles.
- ■Inlet filter.
- ■2 m inlet hose.
- ■10 m high-pressure hose.
- ■User manual.
After unpacking, check that the package is complete and in good condition. Report any missing items or transport damage to the seller.
Transport and storage
Protect the pressure washer from frost. Water freezing in the pump may damage the pump head and motor.
- ■Before moving the pressure washer, switch it off, disconnect the power supply and press the spray gun trigger to release the pressure in the hose.
- ■Do not throw the pressure washer during transport; protect it from shocks and excessive vibration.
- ■Protect the device from moisture, dust and extreme temperatures during transport.
- ■Drain the water from the system before storage. Store the pressure washer horizontally in a dry, well-ventilated place at 5–40 °C, away from direct sunlight and heat sources.
- ■Do not place objects on the device. Do not crush the power cable or kink the high-pressure hose.
Application
The pressure washer is used to clean technical installations, machinery, equipment and work surfaces in the air conditioning and refrigeration industry and in industrial applications.
Connection
Preparation
- 01Check the condition of the power cable and inlet filter and make sure that the screws and nuts on the device are not loose.
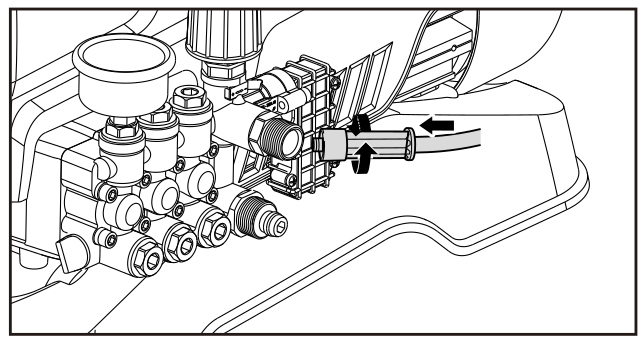
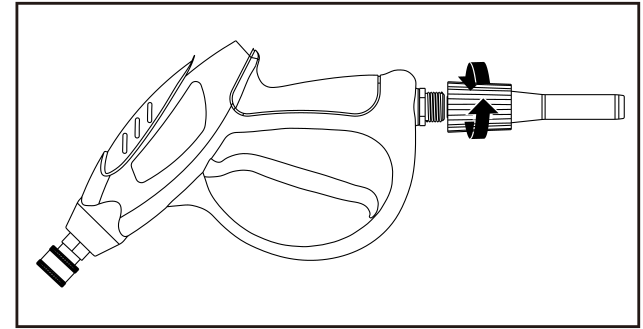
- 02Connect the high-pressure hose to the water outlet on the pressure washer and the other end to the spray gun.
Water supply
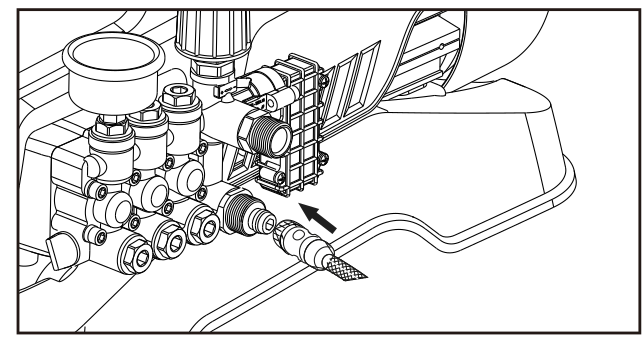
- 01Connect the inlet hose to the water inlet on the pressure washer. A rubber seal must be fitted in the connection.
- 02Connect the other end of the hose to a tap, or fit the inlet filter to it and immerse it in a water tank. The water level in the tank must not be lower than the pressure washer.
- 03Check the connections for leaks. If using a tap, turn on the water supply.
Bleeding air
- 01Leave the spray gun without a nozzle and set the pressure to its lowest level using the pressure adjustment knob.
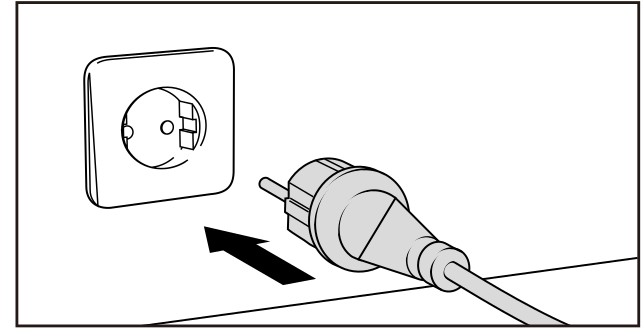
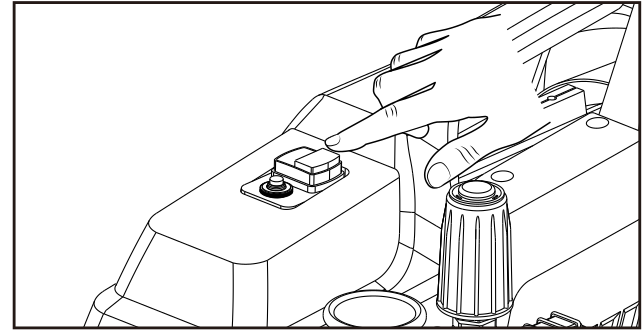
- 02Connect the power supply and press the spray gun trigger, then turn on the pressure washer using the power switch.
- 03Hold the trigger until the water flows in a steady stream. If drawing water from a tank, continue bleeding air for 1 min after water begins to flow.
- 04Switch off the pressure washer, disconnect the power supply and press the spray gun trigger to release the pressure in the hose.
Operation
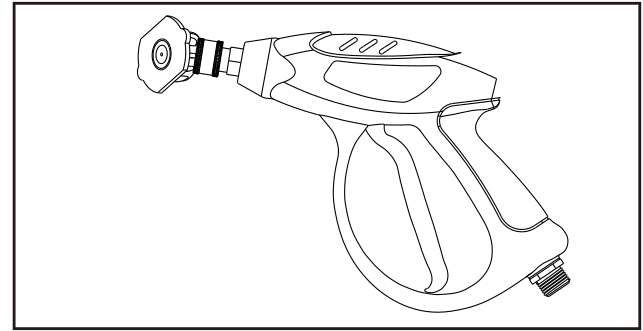
- 01After bleeding the air and stopping the pressure washer, fit the lance and the selected 0°, 15° or 25° nozzle. Use a concentrated jet for heavier soiling and a wider jet for larger surfaces.
- 02Connect the power supply and press the spray gun trigger, then turn on the pressure washer using the power switch. Select the pressure to suit the soiling and the surface being cleaned; adjust it using the knob while watching the pressure gauge.
- 03During cleaning, hold the nozzle within 10 cm of the surface being cleaned. The force of the jet decreases as the distance increases.
Water droplets from the drain hole in the pump body during operation are normal.
Finishing work
Switch off the pressure washer, disconnect the power supply and press the spray gun trigger to release the pressure in the hose. Drain the water from the pump before putting it away.
Maintenance
Perform maintenance only if you have the appropriate training and tools.
Cleaning after use
- ■Clean the housing with a soft brush or cloth. Do not use water, alcohol, petrol, solvents, corrosive substances, strong detergents or polishes to clean the housing. Do not allow chemicals to enter the pressure washer.
- ■Remove debris, particularly from the ventilation slots. Regularly remove debris from the inlet filter mesh.
- ■Check that the nozzles are clear and inspect the condition of the spray gun.
Draining the pump
- 01With the pressure washer switched off, the power supply disconnected and the pressure released, turn off the tap if using one and disconnect the inlet hose from the pressure washer.
- 02Connect the power supply and run the motor using the power switch for a few seconds without a water supply.
- 03Switch off the pressure washer, disconnect the power supply and press the spray gun trigger to remove the remaining water.
Checking and changing the oil
Check the oil level before each use. The oil should reach halfway up the oil level sight glass. Change the oil for the first time after 20 h of operation of the new pressure washer, and every 200 h thereafter.
- 01With the pressure washer switched off and disconnected from the power supply, unscrew the oil filler cap and drain plug and drain the used oil.
- 02Flush the oil chamber several times with clean paraffin, pouring it in through the oil filler and draining it through the oil drain. After emptying the chamber, tighten the drain plug.
- 03Fill the oil chamber through the oil filler with 15W-40 engine oil of API CD grade and tighten the oil filler cap.
After maintenance
- 01Refit any accessories removed, check the connections for leaks and inspect the condition of the cables and hoses.
- 02Connect the pressure washer to the water and power supplies as described in the ‘Connection’ section and carry out a brief operating test.
Troubleshooting
| Problem | Possible cause | Solution |
|---|---|---|
| Pressure washer does not start | No power supply | Check the power supply. |
| Pressure washer does not start | Incorrect supply voltage | Check that the supply voltage is within ±5% of the rated voltage. |
| Pressure washer does not start | Ambient temperature too low | Move the pressure washer to a warmer place (5–40 °C). |
| Low pressure or no water being pumped | Air in the water line | Switch off the pressure washer, disconnect the power supply and press the spray gun trigger to release the pressure in the hose. Disconnect the lance, then, with the water supply connected, connect the power supply, press the trigger and run the pressure washer for a few seconds to remove the air. |
| Low pressure or no water being pumped | Blocked water inlet | Clean the inlet filter. |
| Low pressure or no water being pumped | Debris inside the system | Have the device repaired by a service centre - submit a service request at wipcool.pl/serwis. |
| Water leaks | Loose connection | Check and tighten the connection. |
| Water leaks | Damaged rubber seal | Replace the rubber seal. |
| Noisy operation | Air being drawn in | Check the water level and inlet hose. |
| Noisy operation | Damage to internal parts | Switch off the pressure washer. Have it repaired by a service centre - submit a service request at wipcool.pl/serwis. |
If the motor hums but does not turn after a long period of inactivity, switch off the pressure washer immediately. Have it repaired by a service centre - submit a service request at wipcool.pl/serwis.
Waste electrical and electronic equipment
- 01The crossed-out bin symbol means that the discarded device must not be disposed of with other waste.
Under the applicable regulations on waste electrical and electronic equipment, products marked with the separate collection symbol must not be disposed of with other municipal waste. Because they contain harmful substances, electronic products that are not sorted separately may be hazardous to the environment and human health. Proper separate collection of waste electrical and electronic equipment prevents adverse effects on the environment.
By taking discarded equipment to a collection point, the user contributes to its reuse, recycling and recovery.
Recycling - a method of protecting the environment. The process of recovering substances from waste that can be reused as raw materials.
Recovery - the use of waste that has lost its useful value, such as plastics, paper and cardboard, as secondary raw materials (also commonly understood to mean destruction).
Information on the collection system for waste electrical and electronic equipment
- ■Waste electrical and electronic equipment must not be disposed of with other waste.
- ■The collection of incomplete electrical and electronic equipment and parts from discarded equipment is prohibited.
- ■A distributor supplying equipment intended for households to a purchaser must collect waste household equipment free of charge at the place of delivery, provided that the discarded equipment is of the same type and performs the same function as the equipment supplied.
- ■The user may hand over discarded equipment to a waste equipment collector, a treatment facility or a municipal waste collector in the municipality.
- ■Information on collection points is available on the Public Information Bulletin (BIP) websites of regional, city and municipal offices.
Service and documents
Before submitting a request, have the following ready:
- ■Model - shown on the device nameplate and on the invoice.
- ■Serial number - if there is none, provide the production number (e.g. 11/2025), usually found on the underside of the device.
- ■Proof of purchase - an invoice or receipt from an authorised distributor.
- ■Description of the fault - what is happening, when it started and under what conditions.
You can submit a service request at wipcool.pl/serwis. The warranty terms are also available there.