
 Distribution PL · 4REF
Wipcool C35S user manual
Read the entire manual before first use. Keep it for as long as you use the device.
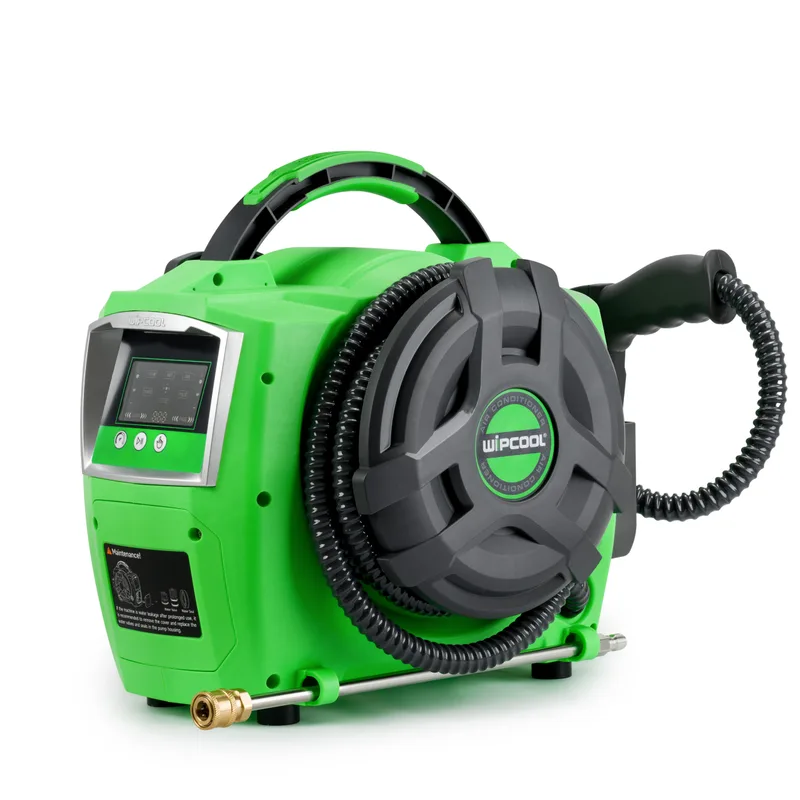
Wipcool C35S user manual
The Wipcool C35S combines the functions of a pressure washer and a steam cleaner; it also has pulse cleaning and ozone disinfection modes. It is used to clean air conditioners, small refrigeration units, evaporators, condensers and other HVAC system components, as well as extractor hoods, refrigerators and water heaters. Steam removes grease, dust and deposits.
The user manual is an integral part of the product. Please read this manual carefully and follow all instructions closely.
General information
Wipcool products are designed for professional use by qualified air conditioning and refrigeration engineers. As the manufacturer, Wipcool specifies that our equipment should only be operated by suitably qualified and trained persons.
- ■Observe all local safety regulations and general safety standards when using the Wipcool C35S Pressure Washer with Steam Function.
- ■Keep the user manual near the device so that personnel can access it easily at all times.
- ■Before use, qualified personnel should read the user manual carefully and understand all the instructions it contains.
- ■The manufacturer accepts no liability for any damage resulting from improper use, failure to follow the user manual, lack of personnel qualifications or any unauthorised modifications to the device.
- ■The general terms of sale set out in the sales documents apply.
Symbols and conventions
Signs and symbols used on the device and in the manual:
- 01
 Warning - read the text in the box next to the symbol.
- 02
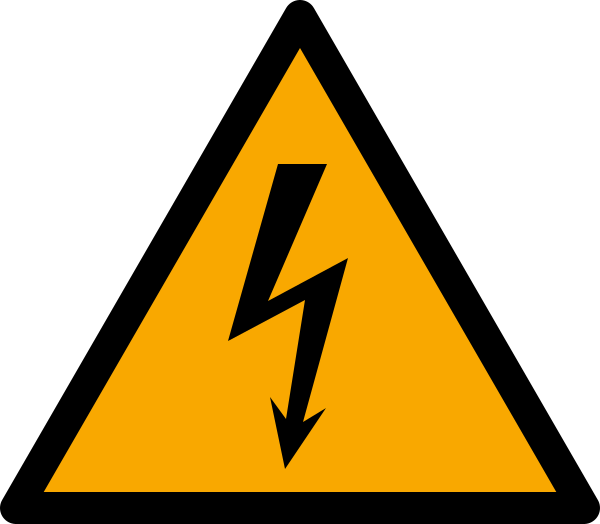 Dangerous voltage - risk of electric shock.
- 03
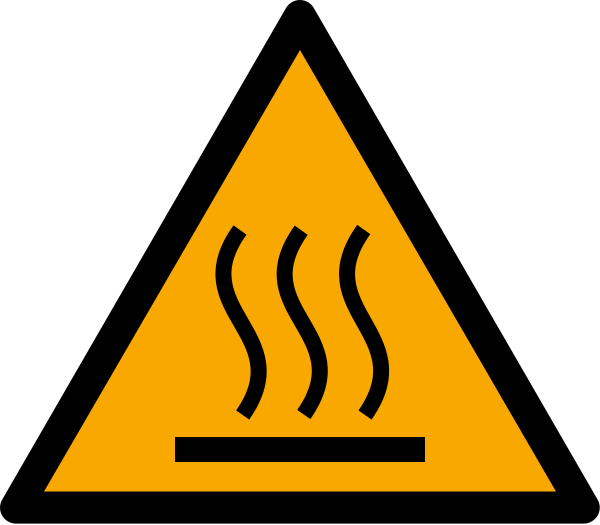 Hot surface - wait for it to cool before touching.
- 04
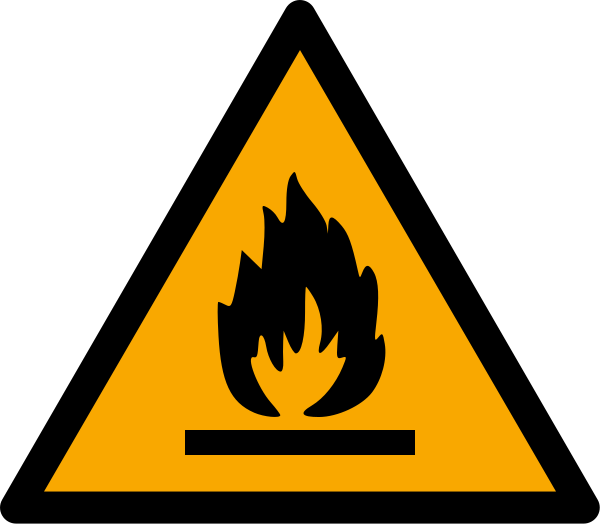 Flammable materials - risk of fire or explosion.
- 05
 Wear eye protection.
- 06
 Notice - risk of damage to the device or an incorrect result.
- 07
 Before starting work, read all safety and installation instructions carefully.
- 08
 Indicates that the product meets the health, safety and environmental standards applicable in the European Union.
- 09RoHSThe product meets the requirements for restricting the use of hazardous substances.
- 10
 Do not dispose of the pressure washer with household waste.
The labels COOL (cold water), HOT (hot water), STEAM (steam), DISINFECT (ozone disinfection) and PULSE (pulse cleaning) correspond to the device modes. START/STOP starts or stops operation, and FUNCTION identifies the function button on the spray gun. On the panel, COLD means COOL and DFN means DISINFECT. H / M / L indicate high / medium / low pressure levels.
Safety information
Only an adult may operate the device. The pressure washer must be connected in accordance with local electrical regulations.
Use the manufacturer's original accessories and power cord.
- ■The inlet water temperature must not exceed 50 °C.
- ■Do not use the pressure washer without the inlet filter. Contamination can block the pump, reduce pressure or stop the water flow.
- ■Do not immerse the spray gun in water - this may damage its internal components.
- ■Do not block the steam outlet during operation; a rise in pressure can cause serious damage to the device.
Technical specifications
General specifications
COOL - cold water
HOT - hot water
STEAM - steam
DISINFECT - ozone
Device diagram
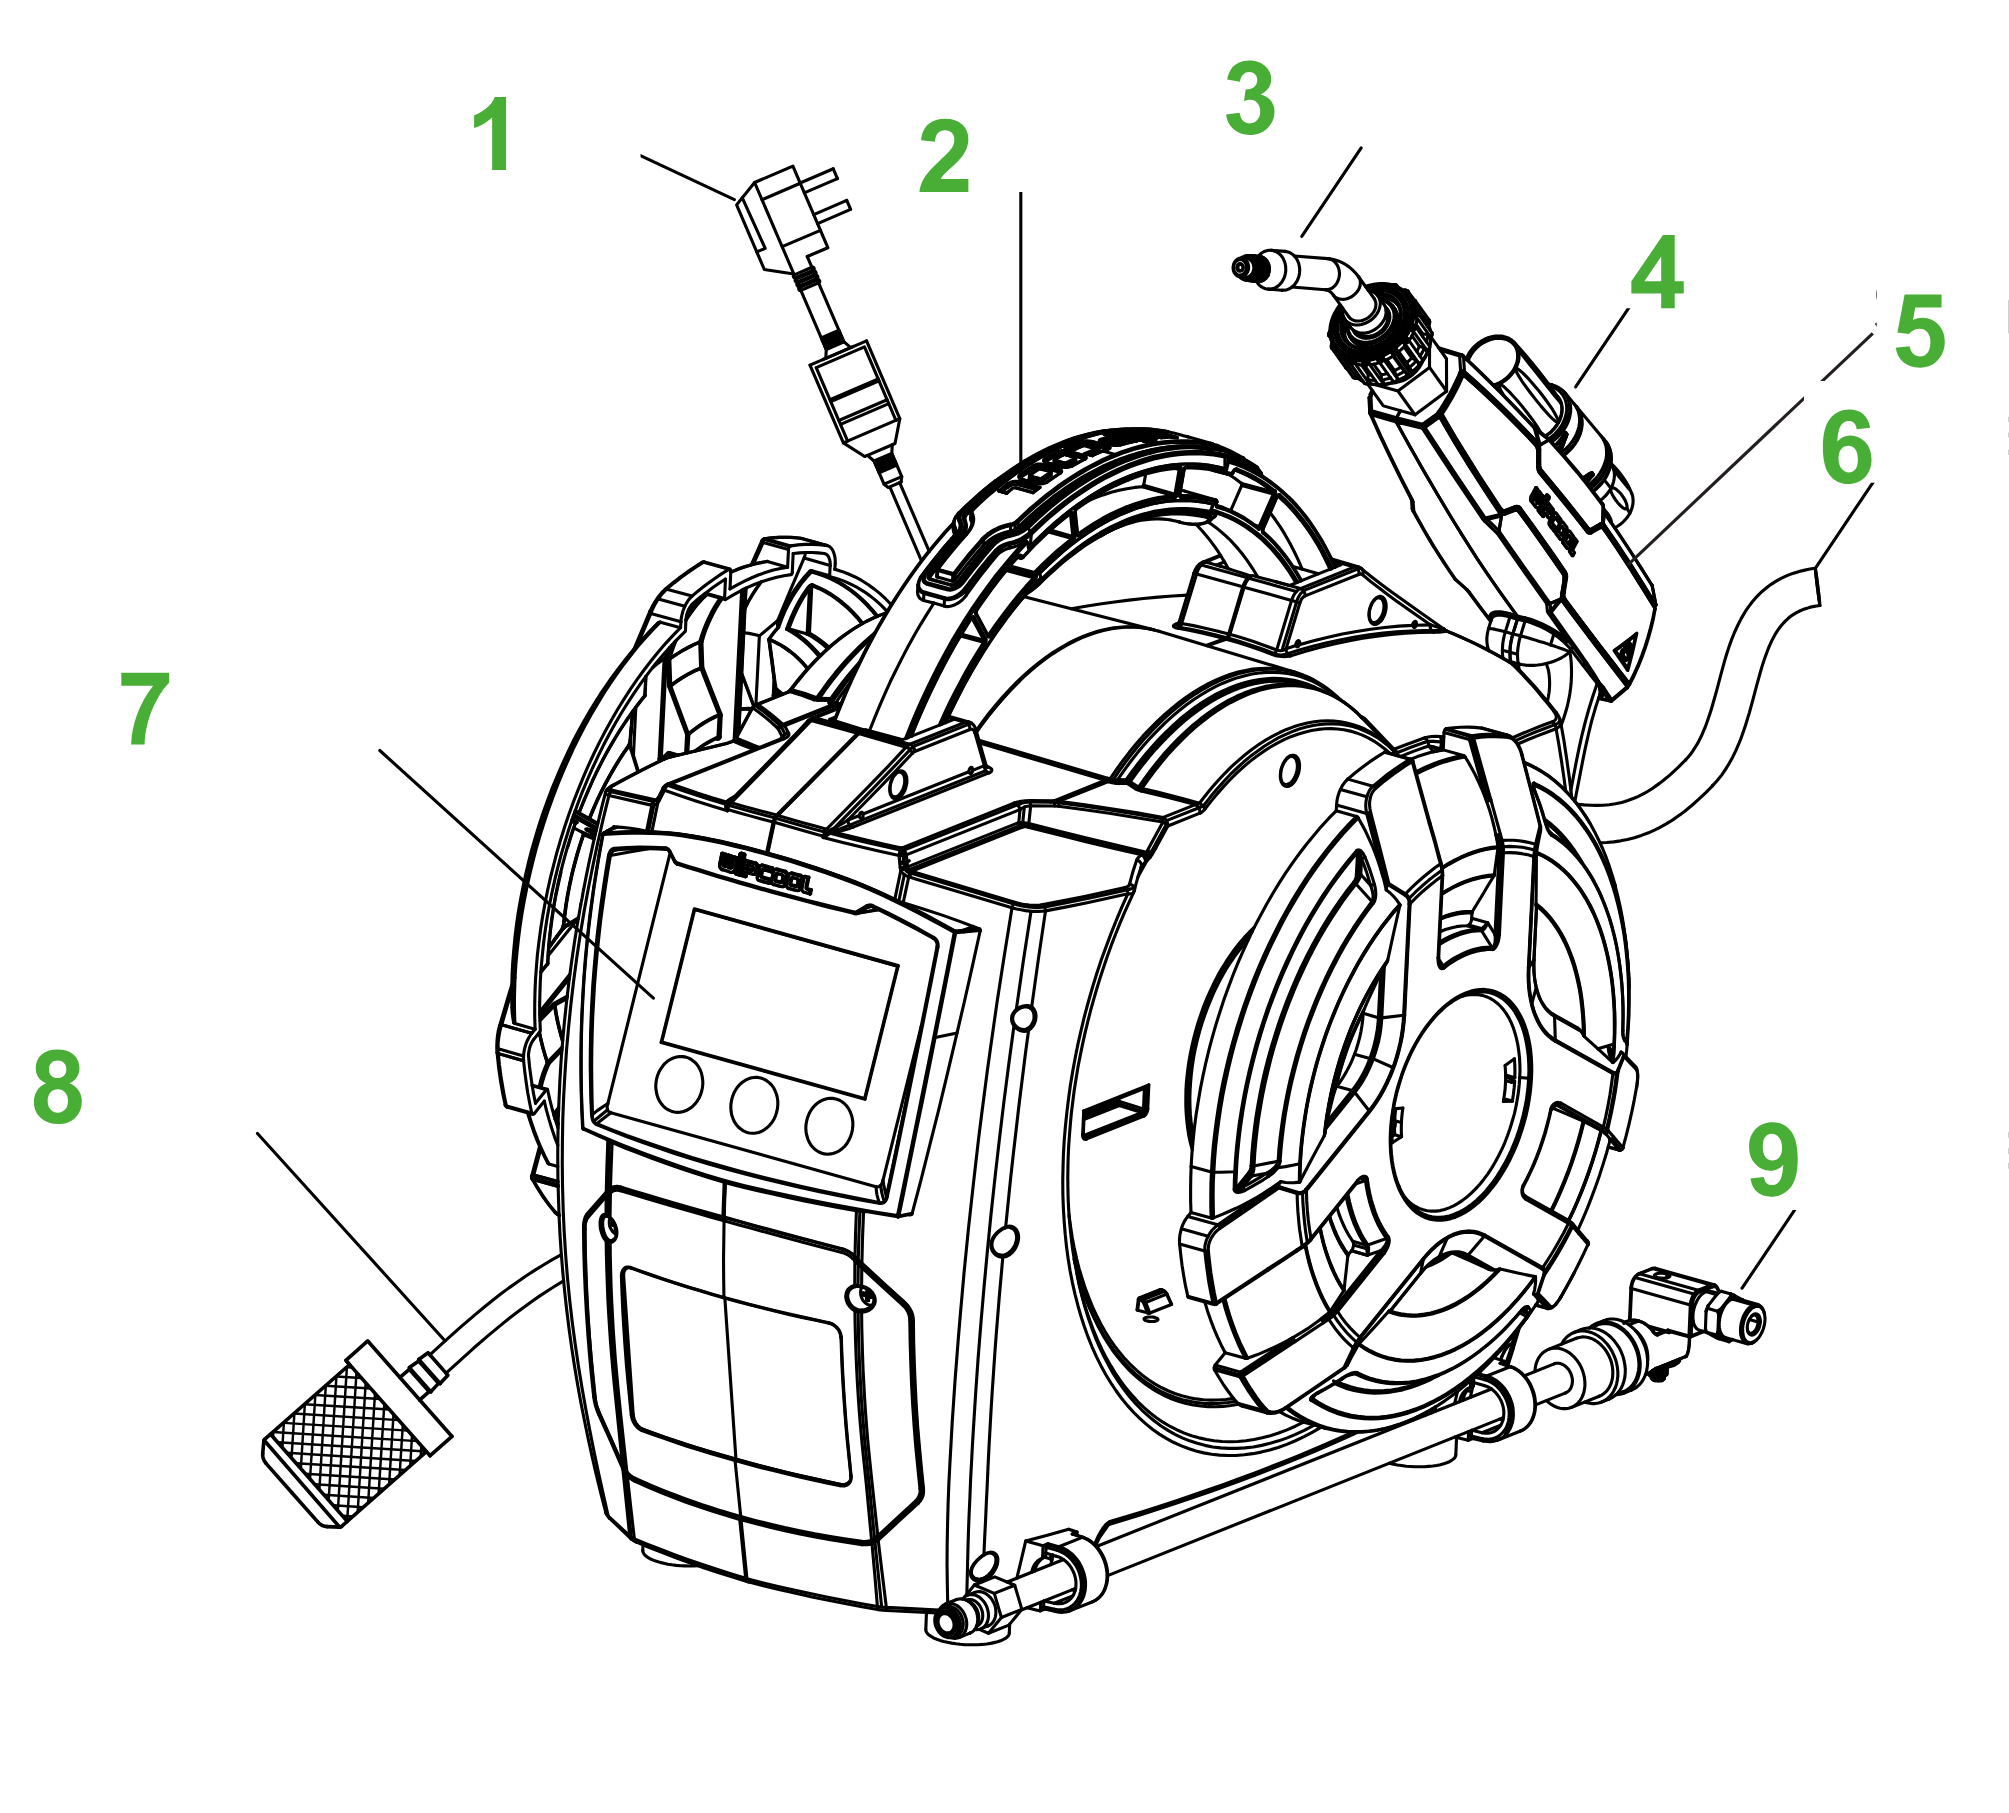
| No. | Name |
|---|---|
| 1 | Plug with switch |
| 2 | Carrying handle |
| 3 | Universal nozzle |
| 4 | Torch |
| 5 | Spray gun |
| 6 | Ozone disinfection hose |
| 7 | LCD touchscreen |
| 8 | Inlet hose with inlet filter |
| 9 | Water nozzle |
Cold water, hot water and steam flow through the same outlet hose. The hoses are wound onto a reel in the housing.
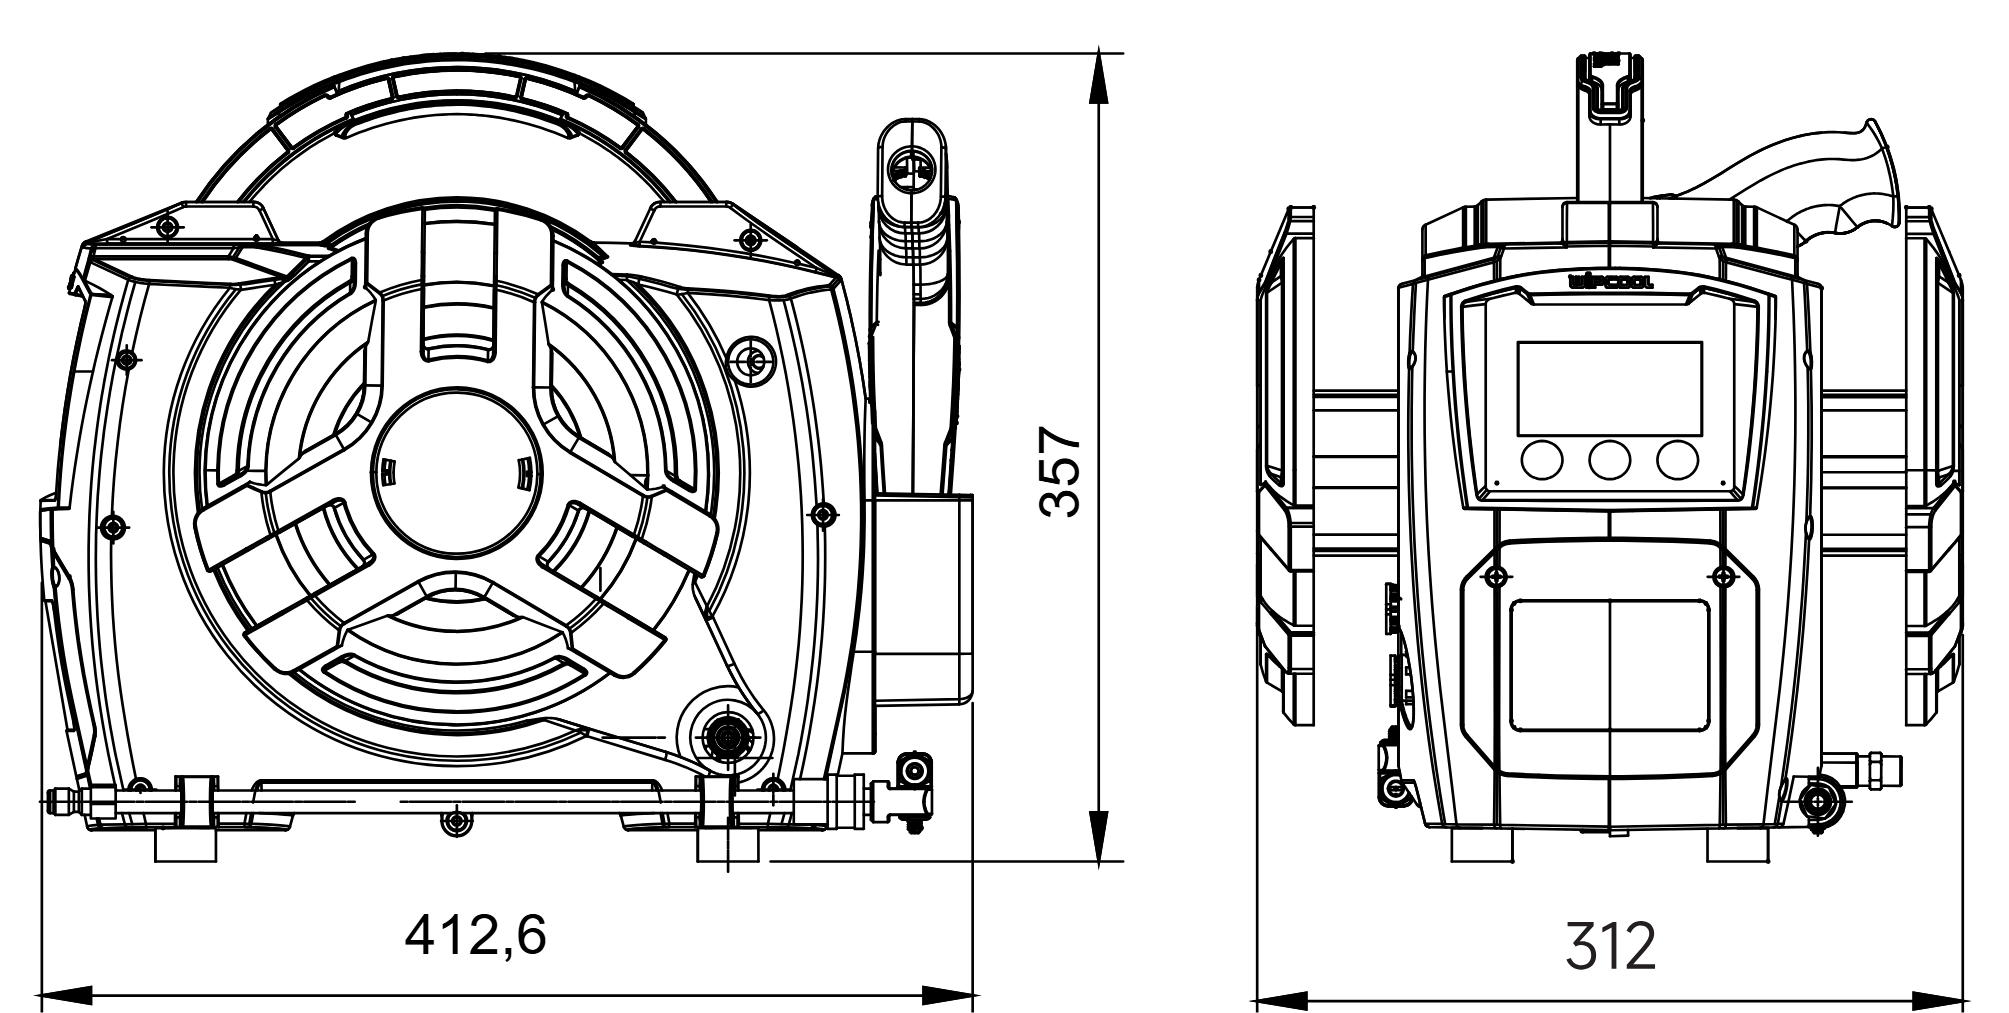
Pressure washer dimensions
Package contents
- ■C35S pressure washer with power cord, inlet hose and inlet filter, fixed outlet hose with spray gun, and black ozone disinfection hose.
- ■Universal nozzle.
- ■10 cm long steam nozzle.
- ■290° rotating nozzle with 26 cm extension.
- ■0°, 15° and 25° water nozzles and an 18 cm long bent 25° nozzle.
- ■36 cm extension and nylon brush.
After unpacking, check that the package is complete and in good condition. Report any missing items or transport damage to the seller.
Transport and storage
Transport
Wind up the hoses and cords and secure the pressure washer against movement and damage during transport. Do not throw the device; avoid shocks and excessive vibration. Protect it from moisture, dust and extreme temperatures.
Storage
After use, carry out the steps described in ‘Finishing work’. Place the pressure washer securely on its base. Store it in a dry, ventilated place at a temperature of 5–40 °C, away from direct sunlight and heat sources. Protect the pressure washer from frost. Water frozen in the pump can damage the head and motor.
Button and control panel functions
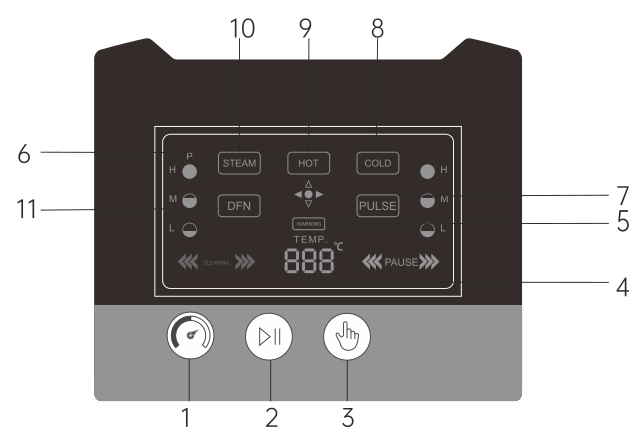
| No. | Function name | Description |
|---|---|---|
| 1 | Adjustment button | Changes the H / M / L pressure level in COOL mode. |
| 2 | START/STOP button | Starts or stops operation. |
| 3 | Mode selection button | Switches between COOL / HOT / STEAM / DISINFECT / PULSE. |
| 4 | Temperature indicator | Shows the current water or steam outlet temperature. |
| 5 | HIGH TEMP indicator | Indicates overheating and activation of the thermal protection. |
| 6 | Pressure indicator | Shows the H / M / L level. |
| 7 | PULSE mode indicator | Pulse cleaning indicator. |
| 8 | COOL (COLD) mode indicator | Cold water mode indicator. |
| 9 | HOT mode indicator | Hot water mode indicator. |
| 10 | STEAM mode indicator | Steam mode indicator. |
| 11 | DISINFECT (DFN) mode indicator | Ozone disinfection indicator. |
Voice notifications
The voice notification indicator is the speaker symbol in the centre of the panel, below the HOT and STEAM mode indicators. In the STOP state, hold the mode selection button (no. 3) for 3 s until the speaker symbol goes out - voice messages will be disabled. To enable them, hold the button again for 3 s until the symbol lights up.
Spray gun
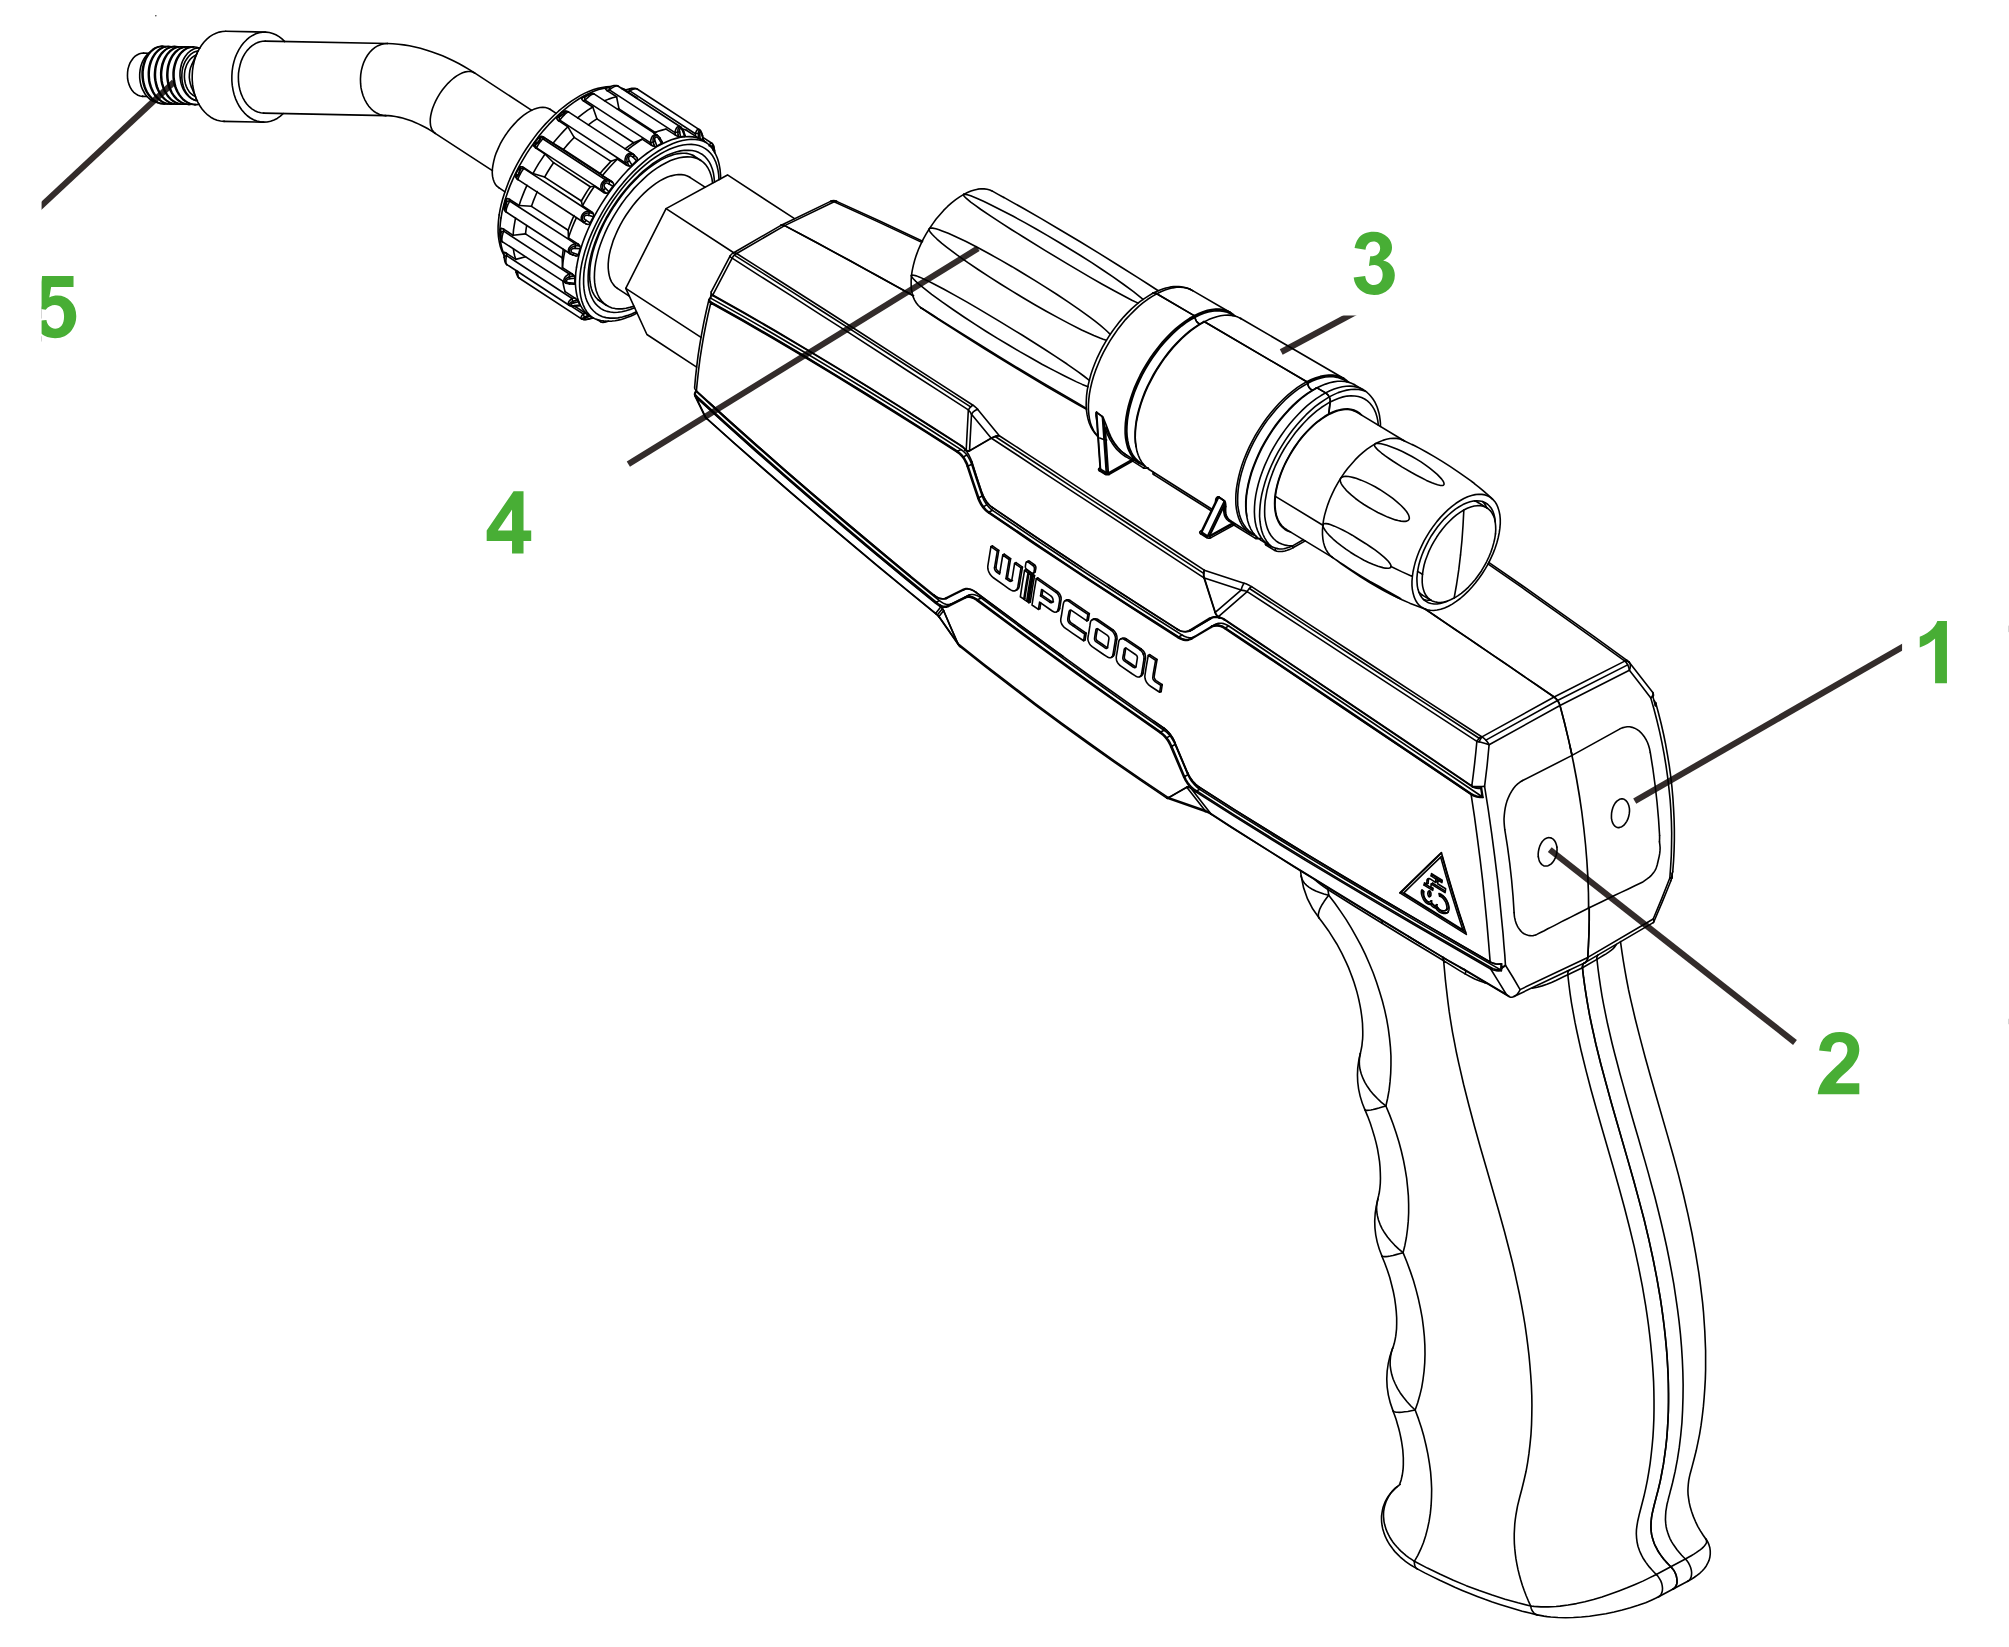
| No. / component | Function |
|---|---|
| 1 - FUNCTION button in the STOP state | Selects COOL, HOT, STEAM, DISINFECT or PULSE mode. |
| 1 - FUNCTION button during operation in COOL mode | Changes the water pressure: low / medium / high. |
| 2 - START/STOP button | Starts or stops operation. |
| 3 - spray gun power supply | Supplies power to the spray gun controls. Have the service team select and replace the spray gun power supply - submit a service request at wipcool.pl/serwis. |
| 4 - torch | Illuminates the work area. |
| 5 - universal nozzle | Attachment for use in STEAM mode. |
Connection
- 01Check the condition of the pressure washer, power cord, plug with switch and accessories. Check that the inlet filter and nozzle are clear, and check the mountings and connections.
- 02With the power supply disconnected, after the device has cooled and the pressure has dissipated on its own, unscrew the attachment from the spray gun.
- 03Place the inlet hose with the inlet filter in a container of clean water. The inlet filter must be below the water surface.
- 04Connect the pressure washer to an earthed socket with a power supply matching the rating plate. Set the switch on the plug to ON. When the LCD lights up and you hear a voice message, the pressure washer is ready for use.
Priming
Fill the system with water before cleaning to prevent it from running dry.
- 01Point the spray gun without an attachment into a container, select COOL mode and press START/STOP. Wait until the water flows in a steady stream.
- 02Stop operation using START/STOP.
How to use
Selecting and changing the attachment
| Mode | Attachment |
|---|---|
| STEAM | Universal nozzle or long steam nozzle with a Ø2 mm opening. |
| COOL / HOT | 0°, 15° or 25° water nozzle or 290° rotating nozzle. |
| PULSE | Rotating nozzle for water operation. |
Do not use water nozzles in STEAM mode. Use the bent nozzle and extensions in hard-to-reach places.
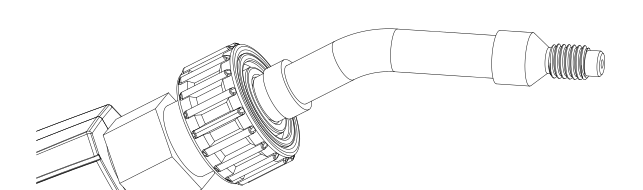
HOT and STEAM modes operate with factory settings. The H / M / L pressure can only be adjusted in COOL mode.
Cleaning with water or steam
- 01Prepare the pressure washer as described in the ‘CONNECTION’ section.
- 02Disconnect the power supply and, once the device has cooled and the pressure has dissipated, fit the attachment selected for the mode. Then reconnect the power supply and set the switch on the plug to ON.
- 03In the STOP state, select the mode on the panel or using the spray gun FUNCTION button. Point the nozzle into a container and start operation using START/STOP.
- 04In COOL mode, select the pressure using the adjustment button on the panel or the spray gun FUNCTION button: L - 10 bar, M - 20 bar, H - 30 bar. Monitor the current parameters on the display.
- 05In COOL and HOT modes, turn the rotating nozzle left or right to set the direction of the jet.
- 06In STEAM mode, wait approximately 25–30 s for steam to be prepared. Pressurised water flows from the nozzle for approximately 1 s. Keep the nozzle over a container during this time.
- 07Point the nozzle at the surface to be cleaned and start cleaning.
Finishing work
- 01Stop operation using START/STOP. After operation in HOT or STEAM mode, disconnect the power supply, wait for the device to cool and the pressure to dissipate on its own, then remove the steam nozzle if fitted.
- 02Make sure the inlet hose with the inlet filter is submerged in clean water. Connect the power supply and set the switch on the plug to ON.
- 03Point the spray gun into a container, select COOL mode and run clean water through the system for approximately 10 s to flush and cool it.
- 04Stop operation using START/STOP and disconnect the power supply.
- 05Remove the inlet hose from the container. Clean the accessories and inlet filter; leave the pressure washer to dry before storage.
Ozone disinfection - DISINFECT
- 01Leave the air conditioner being cleaned disconnected from the power supply. Place the separate black ozone disinfection hose inside the unit and seal it, for example with an AC cleaning cover.
- 02Connect the pressure washer to the power supply and set the switch on the plug to ON. In the STOP state, select DISINFECT mode and press START/STOP. Leave the device running for approximately 30 min.
- 03Stop the function using START/STOP and disconnect the power supply. Ventilate the room thoroughly.
Maintenance
General recommendations
If the steam is weak, check that the nozzle opening is clear. Remove white deposits that build up during use by descaling. Calcium and magnesium deposits reduce device performance and can trigger the HIGH TEMP alarm. Descale the device every 3–5 uses.
Cleaning and inspection
- 01With the power supply disconnected, after the device has cooled and the pressure has dissipated on its own, remove the inlet filter from the inlet hose, inspect its mesh and the spray gun attachment, and remove any dirt. Clean the accessible nozzle openings and ventilation openings. Do not damage the mesh or nozzle opening.
- 02Check the condition of the hoses, connections and nozzles. Remove dirt from accessible surfaces. Replace worn nozzles as described in ‘Selecting and changing the attachment’. Have damaged hoses and connections replaced by the service team - submit a service request at wipcool.pl/serwis.
- 03Clean the housing with a soft brush or cloth, without using water. Do not use alcohol, petrol, solvents, corrosive substances or strong detergents. Do not allow housing cleaning agents to enter the pressure washer.
- 04Fit the inlet filter and the remaining components. Check their condition and the power cord, then test in COOL mode with clean water as described in the ‘CONNECTION’ section.
Descaling the device
- 01With the power supply disconnected, prepare a container with a capacity of 3–5 l. Measure out 250 ml of Wipcool Steam Descaler and 1.75 l of water.
- 02After the device has cooled and the pressure has dissipated, unscrew the attachment from the spray gun. Immerse the inlet hose with the inlet filter in the solution and direct the outlet without an attachment into the same container.
- 03After connecting the power supply, set the switch on the plug to ON, select COOL mode and press START/STOP. Circulate the solution for 15–25 min without heating.
- 04Stop operation and replace the solution with clean water.
- 05Restart COOL mode and flush with clean water for 2–5 min without heating.
- 06Stop operation using START/STOP and disconnect the power supply.
Troubleshooting
| Problem | Possible cause | Solution |
|---|---|---|
| Device does not operate / LCD does not light up after connection | Loose plug | Connect the plug properly. |
| Device does not operate / LCD does not light up after connection | Switch on the plug is in the OFF position | Set the switch to ON. |
| Device does not operate / LCD does not light up after connection | No power supply | Check the circuit protection and whether the socket is live. |
| Device does not work / LCD does not light up when connected | Incorrect voltage | Check that the voltage matches the rating plate. |
| Device does not work / LCD does not light up when connected | Damaged power cord | Do not use the pressure washer with a damaged power cord. Have it repaired by the service centre - submit a service request at wipcool.pl/serwis. |
| Device stops during operation | Circuit or socket overload | Stop operation and disconnect the power supply. Connect the pressure washer to a circuit and socket rated for a power consumption of 2.8 kW. |
| Low nozzle pressure | Air in the system | Follow the steps described in ‘Priming’ in the ‘CONNECTION’ section. |
| Low nozzle pressure | Blocked inlet filter | Clean the inlet filter. |
| Low nozzle pressure | Dirty nozzle | Clean the accessible nozzle openings as described in ‘Cleaning and inspection’. |
| Low nozzle pressure | Incorrect nozzle | Select an attachment according to the ‘Selecting and changing the attachment’ table. |
| Low nozzle pressure | Pressure setting too low | In COOL mode, increase the pressure using the adjustment button on the panel or the FUNCTION button on the spray gun. |
| No water flows out during operation | Air trapped in the pump | Follow the steps described in ‘Priming’. |
| No water flows out during operation | Blocked inlet filter | Clean the inlet filter. |
| No water flows out during operation | No water in the tank | Fill the tank with clean water. |
| No steam or uneven steam output | Inlet hose is above the water | Submerge the inlet hose with its inlet filter in water and start operation in COOL mode. |
| No steam or uneven steam output | Blocked inlet filter | Clean the inlet filter. |
| No steam or uneven steam output | Overheat protection has activated | Follow the instructions for the HIGH TEMP alarm in the safety section. |
| No steam or uneven steam output | Dirty water | Use clean water. |
| No steam or uneven steam output | Limescale deposits | Descale the device as described in the ‘MAINTENANCE’ section. |
| No steam or uneven steam output | Dirty nozzle | Clean or replace the nozzle. |
| Water leaks | Loose connection | Tighten the accessible connection. |
| Water leaks | Damaged seal | Have it repaired by the service centre - submit a service request at wipcool.pl/serwis. |
| Unusual noise | Air in the system | Check the water level, the system for leaks and the condition of the inlet hose. |
| Unusual noise | Internal contamination | Have it repaired by the service centre - submit a service request at wipcool.pl/serwis. |
| Unusual noise | Damaged internal components | Have it repaired by the service centre - submit a service request at wipcool.pl/serwis. |
| Ozone treatment does not work | DISINFECT mode inactive | Select DISINFECT mode. |
| Ozone treatment does not work | Damaged ozone module | Have it repaired by the service centre - submit a service request at wipcool.pl/serwis. |
Waste electrical and electronic equipment
- 01The crossed-out wheeled bin symbol means that the end-of-life device must not be disposed of with other waste.
Under the applicable regulations on waste electrical and electronic equipment, products marked with the separate collection symbol must not be disposed of with other municipal waste. Due to their hazardous substance content, electronic products that are not collected separately may pose a risk to the environment and human health. Proper separate collection of waste electrical and electronic equipment prevents adverse effects on the environment.
By taking end-of-life equipment to a collection point, the user contributes to its reuse, recycling and recovery.
Recycling - a method of protecting the environment. The process of recovering substances from waste that can be reused as raw materials.
Waste recovery - the use of waste that has lost its value in use, such as plastics, paper and cardboard, as secondary raw materials (colloquially, also the destruction of waste).
Information on the collection system for waste electrical and electronic equipment
- ■Waste electrical and electronic equipment must not be disposed of with other waste.
- ■The collection of incomplete electrical and electronic equipment and parts from waste equipment is prohibited.
- ■A distributor delivering equipment intended for households to a purchaser must collect waste equipment from households free of charge at the delivery location, provided that the waste equipment is of the same type and performs the same function as the equipment delivered.
- ■The user may hand over waste equipment to a waste equipment collector, a treatment facility or a municipal waste collector in the municipality.
- ■Information on collection points is available on the BIP websites of regional, city and municipal authorities.
Service and documents
Before submitting a request, prepare:
- ■Model - shown on the device rating plate and on the invoice.
- ■Serial number - if it is not present, provide the production number (e.g. 11/2025), usually found on the underside of the device.
- ■Proof of purchase - an invoice or receipt from an authorised distributor.
- ■Description of the fault - what is happening, when it started and under what conditions.
You can submit a service request at wipcool.pl/serwis. You will also find the warranty terms there.