
 Distribution PL · 4REF
Wipcool EF-3K / EF-3MSK user manual
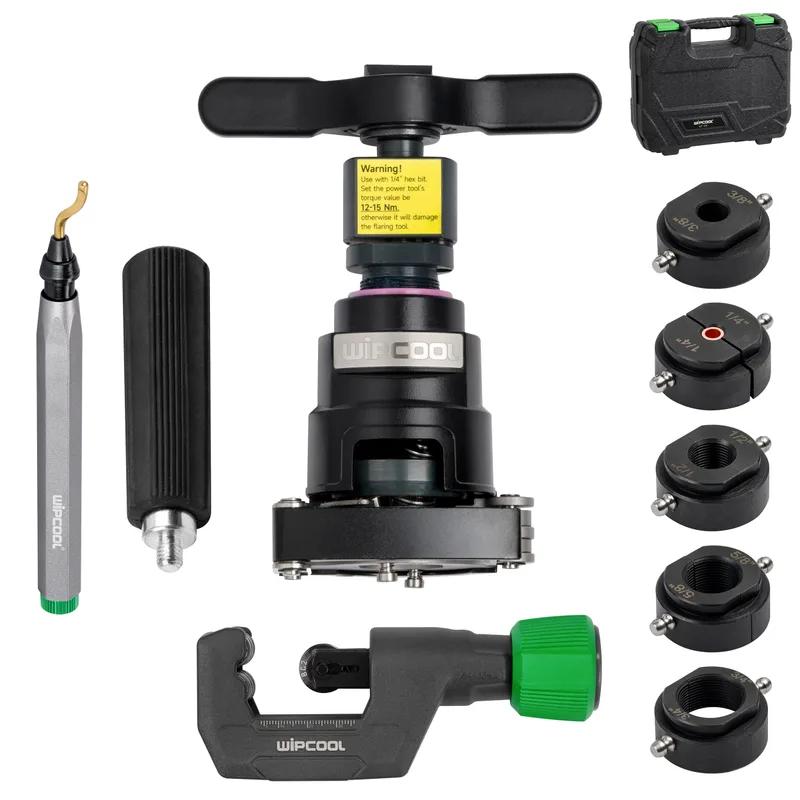
The Wipcool EF-3K / EF-3MSK flaring tool is used to make flares on soft copper tube during the installation and servicing of air conditioning and refrigeration systems. It has a ratchet mechanism and a head with three flaring cones.
The user manual is an integral part of the product. Please read this manual carefully and follow all instructions strictly.
General information
Wipcool products are designed for professional use by qualified air conditioning and refrigeration engineers. As the manufacturer, Wipcool specifies that our products should only be operated by suitably qualified and trained persons.
- ■Comply with all local safety regulations and general safety standards when using the Wipcool EF-3K / EF-3MSK flaring tool.
- ■The user manual should be kept near the tool so that personnel can access it easily at all times.
- ■Before use, qualified personnel should read the user manual carefully and understand all the instructions it contains.
- ■The manufacturer accepts no liability for any damage resulting from improper use, failure to follow the user manual, insufficiently qualified personnel or any unauthorised modifications to the tool.
- ■The general terms of sale set out in the sales documents apply.
Symbols and conventions
Signs and markings used on the tool and in the manual:
- 01
 Warning - read the text in the box next to the symbol.
- 02
 Notice - risk of damage to the tool or an incorrect result.
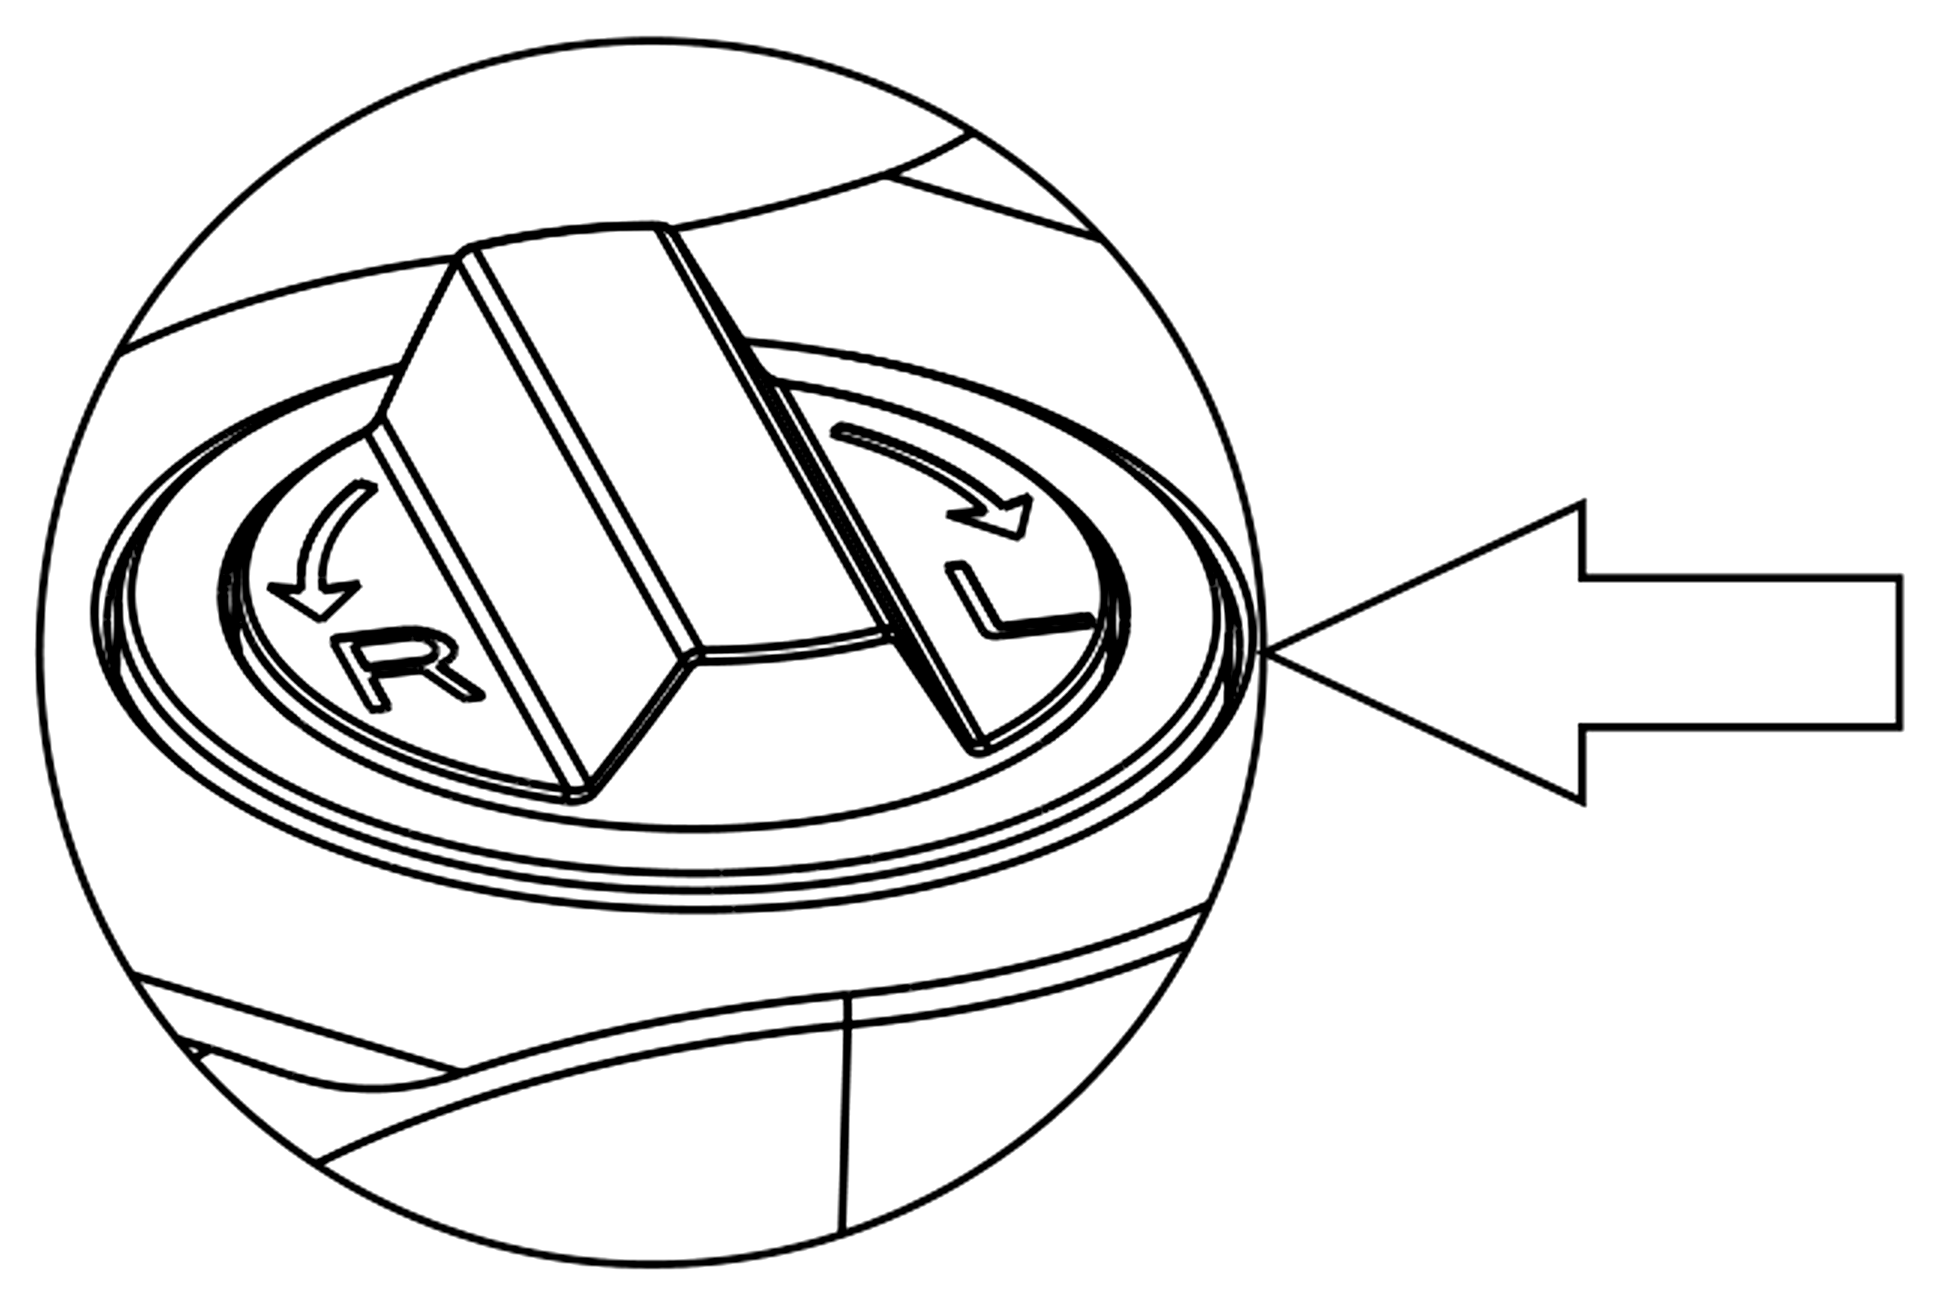
The letters R and L indicate the positions of the ratchet mechanism switch: R - flaring, L - retracting the cones.
Safety information
- ■Before use, check the condition of the ratchet mechanism, clamp and flaring cones. Do not use a damaged tool.
- ■Do not use excessive force when flaring or modify the mechanism yourself.
- ■Use the flaring tool on soft copper tube with diameters of 1/4", 3/8", 1/2", 5/8", 3/4" (EF-3K) or 6, 10, 12, 16, 19 mm (EF-3MSK).
Technical specifications
| Parameter | EF-3K | EF-3MSK |
|---|---|---|
| Tube type | Soft copper tube for HVAC/R systems | |
| Tube outside diameters | 1/4", 3/8", 1/2", 5/8", 3/4" | 6, 10, 12, 16, 19 mm |
| Drive | Manual or drill-driven | |
| Drill torque | 12–15 Nm | |
| Tool weight | 0.8 kg | |
| Tool dimensions (L × W × H) | 270 × 225 × 90 mm | |
| Operating temperature | 0–40 °C |
Tool components
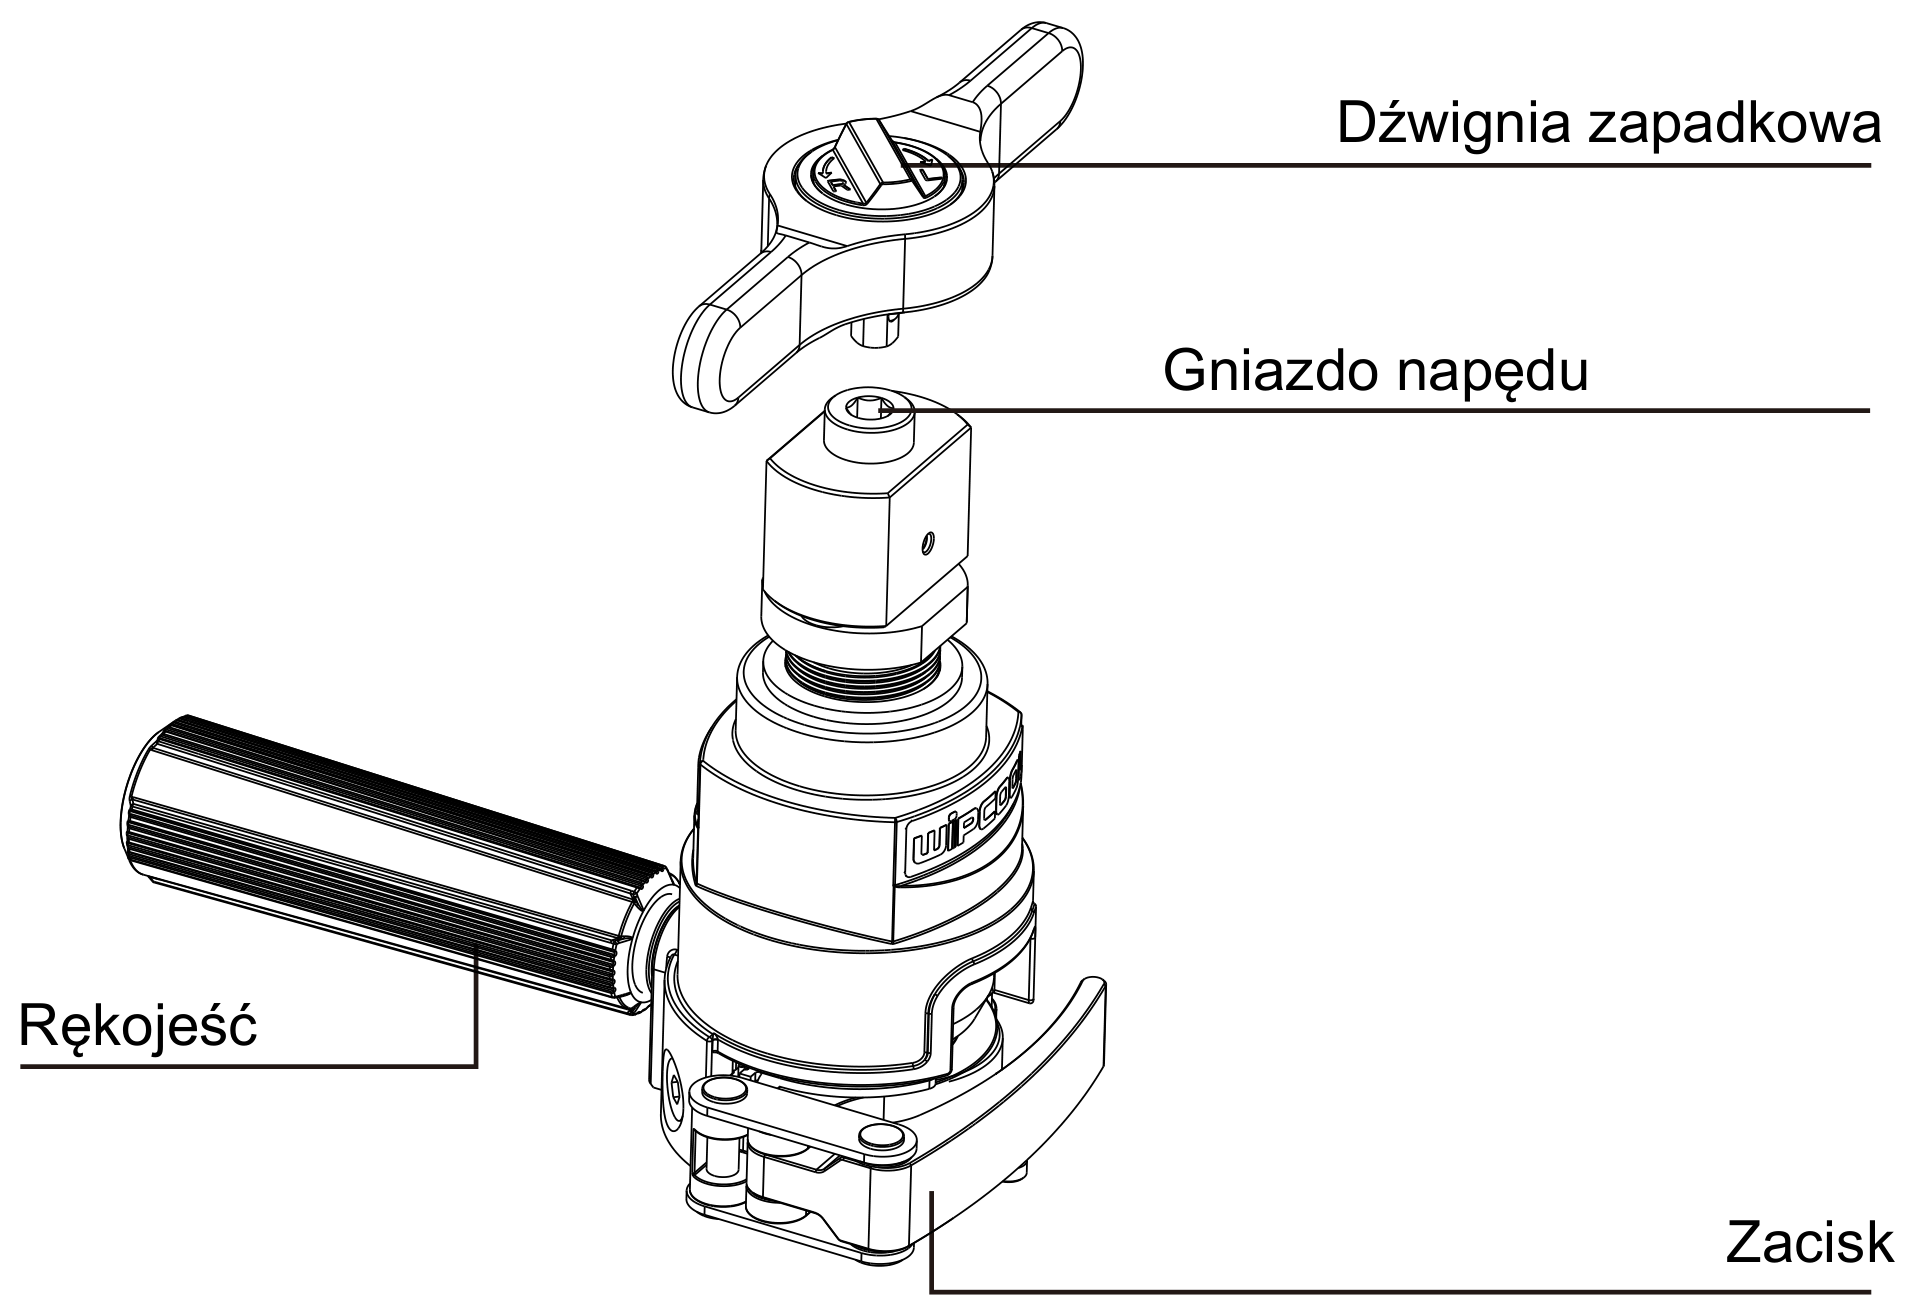
The ratchet lever is used to drive the mechanism manually. The side handle is used to hold the tool, and the clamp secures the tube. The drill drive socket is located under the removable ratchet lever.
Contents of the kit
After unpacking, check that the kit is complete and in good condition. Report any missing or damaged items to the seller.
- ■Flaring tool with three-cone head.
- ■HC-32 tube cutter.
- ■HD-1 deburring tool.
- ■Case.
- ■User manual.
Transport and storage
Transport
Transport the flaring tool in its case or in packaging that protects it from damage. Protect the tool from impacts, heavy shocks, excessive vibration, moisture and dirt.
Storage
Before putting the flaring tool away, fully retract the flaring cones and release the clamp. Store the cleaned tool in a dry, clean and well-ventilated place, away from substances that may cause corrosion.
How to use
Preparation
- 01Cut the tube to the required length, remove burrs from the edge and clean the end.
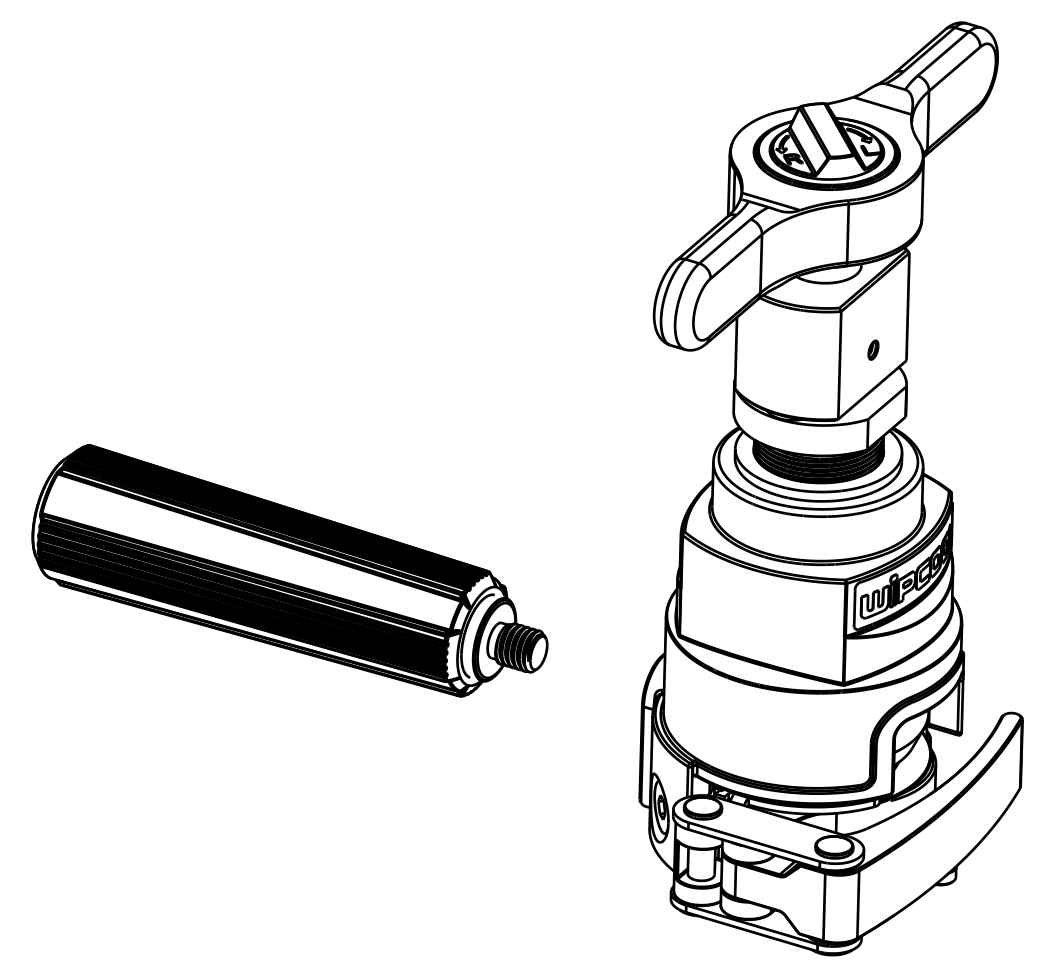
- 02Screw the side handle into the body of the flaring tool and check that it is correctly fitted.
Selecting the size
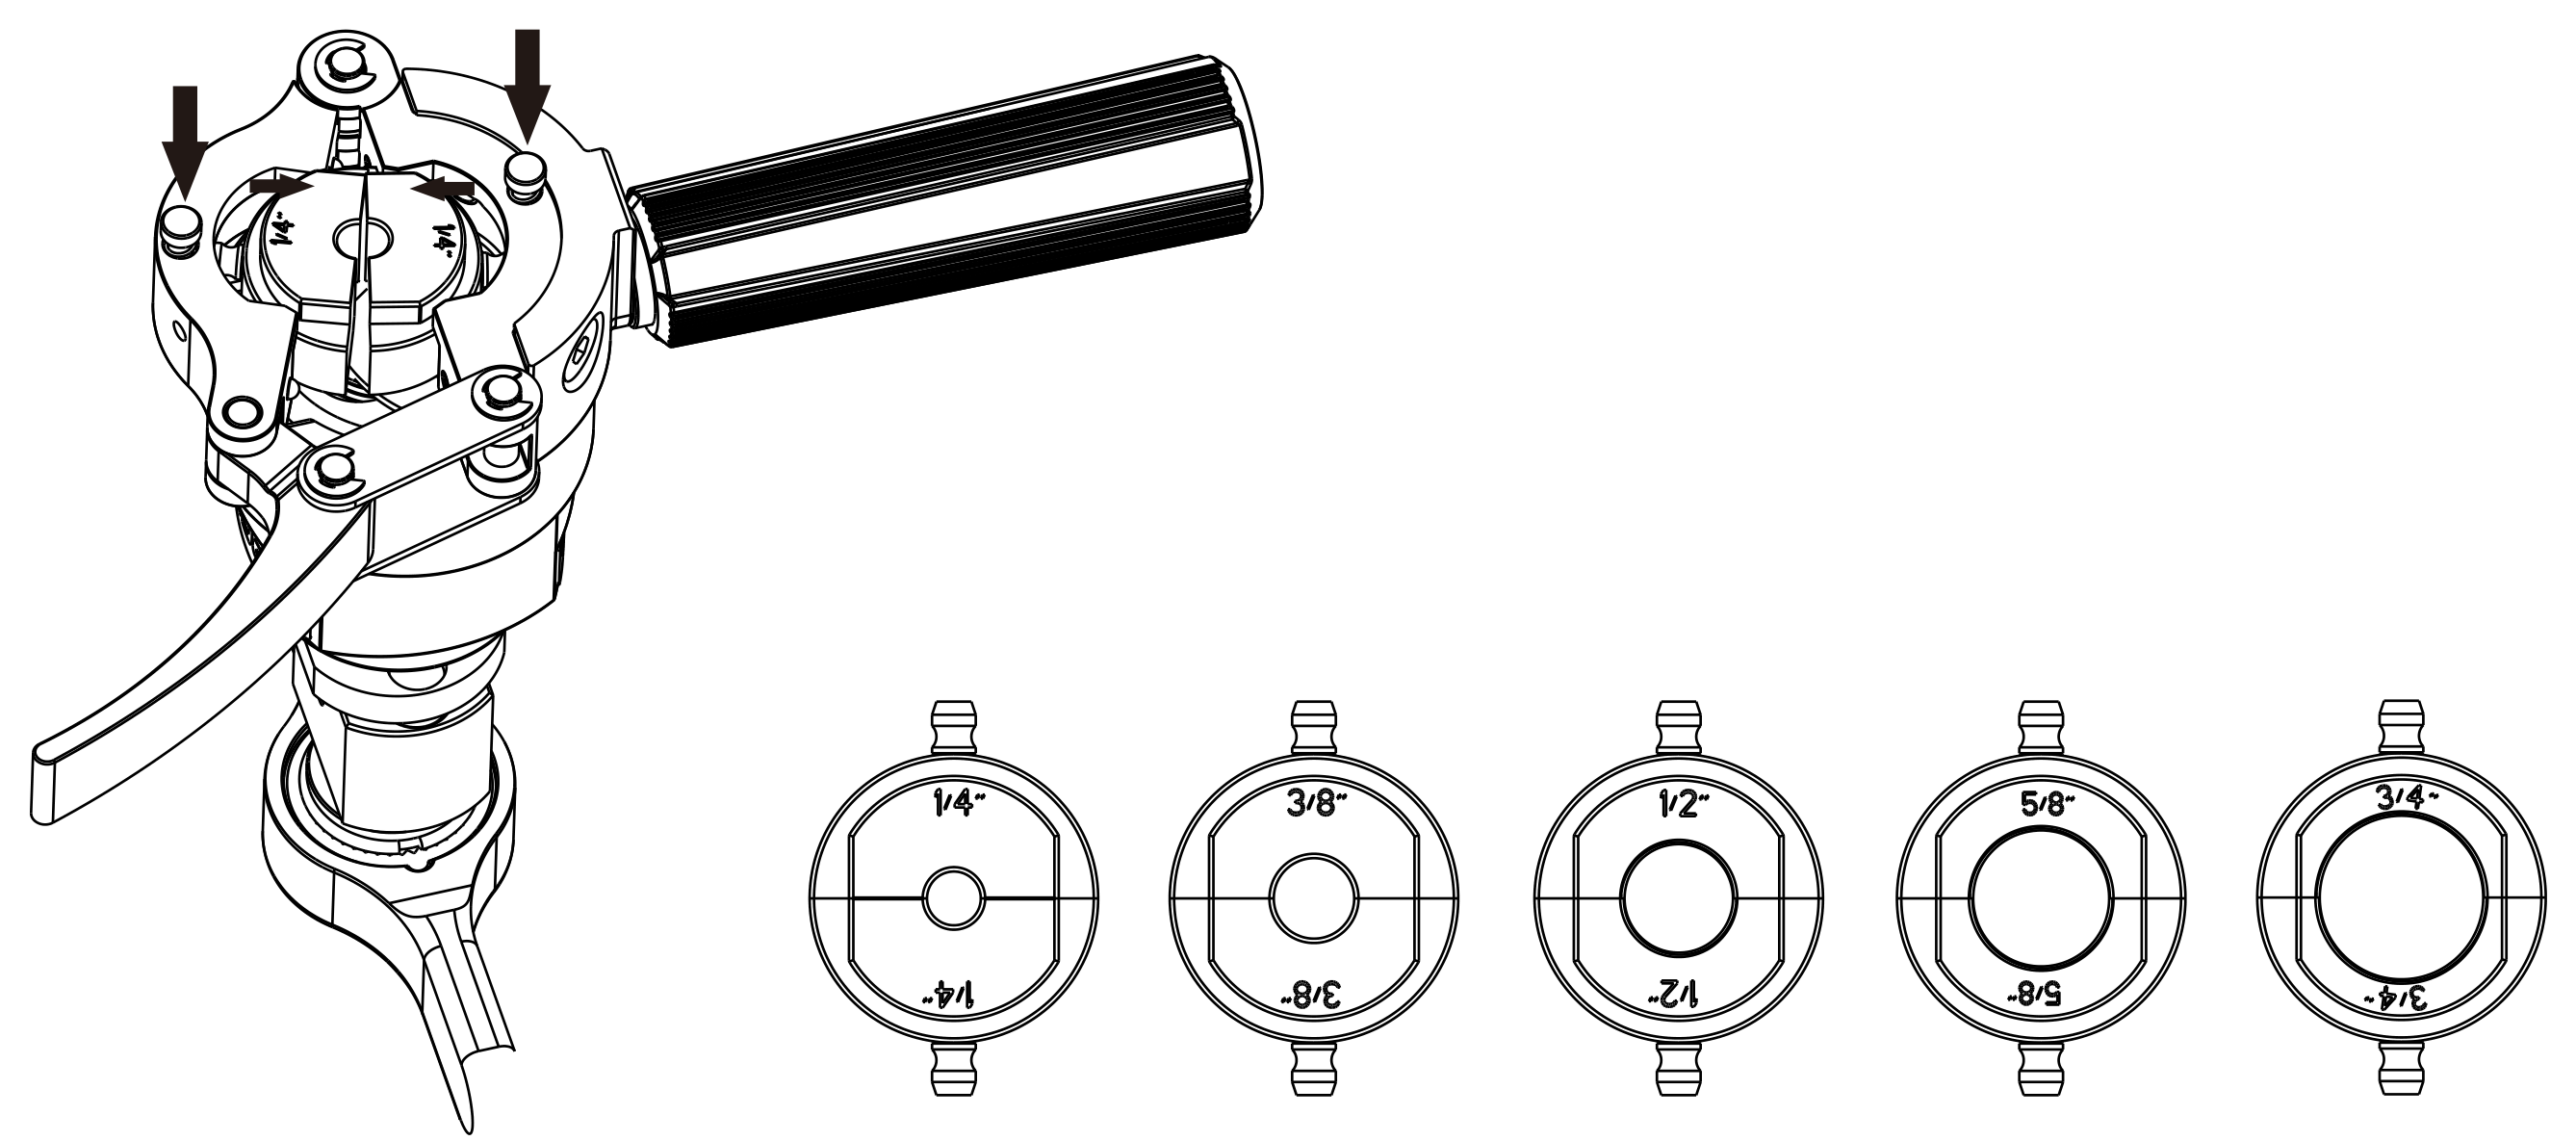
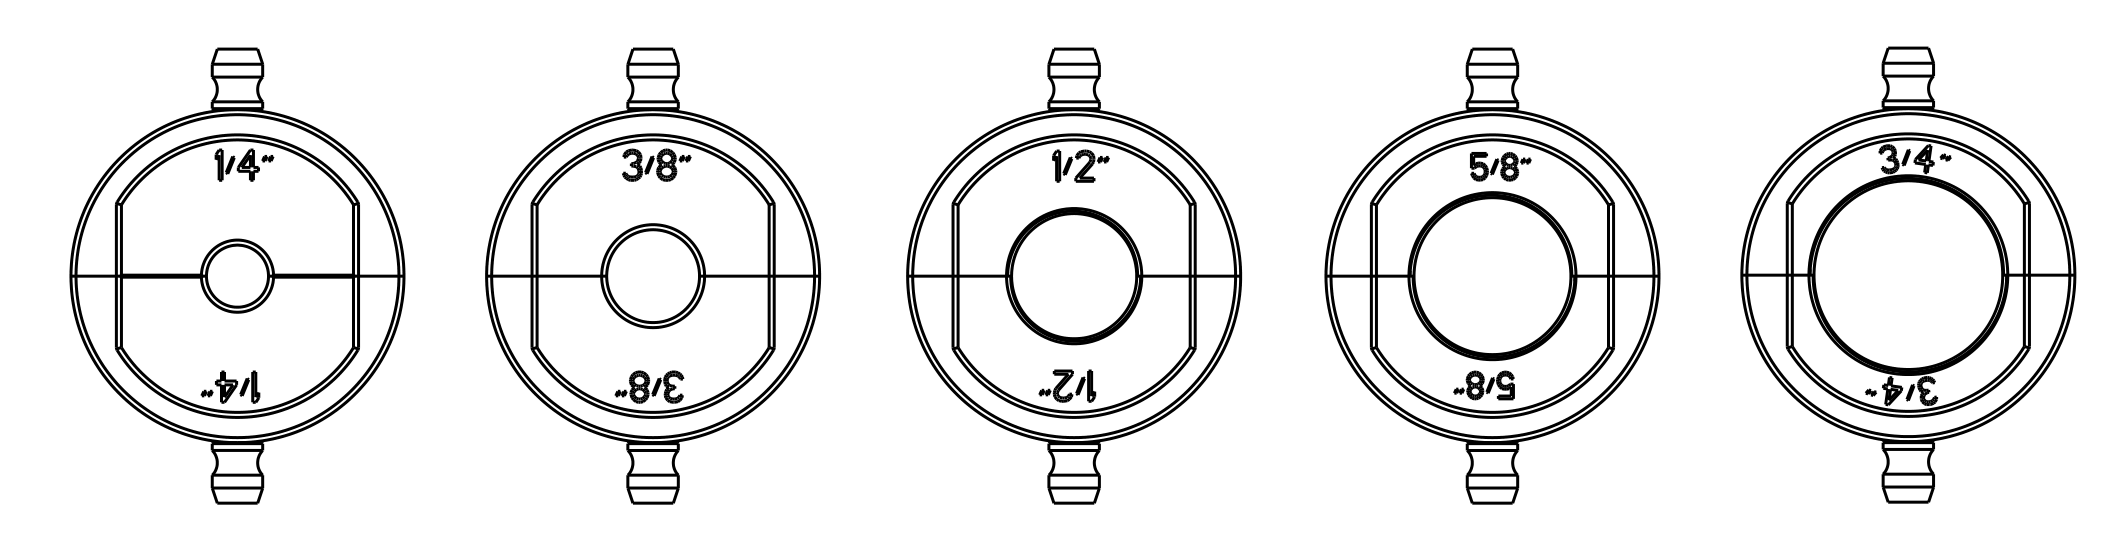
- 01Before securing the tube, press the two buttons at the bottom of the tool and set the flaring size to match the tube diameter.
Securing the tube
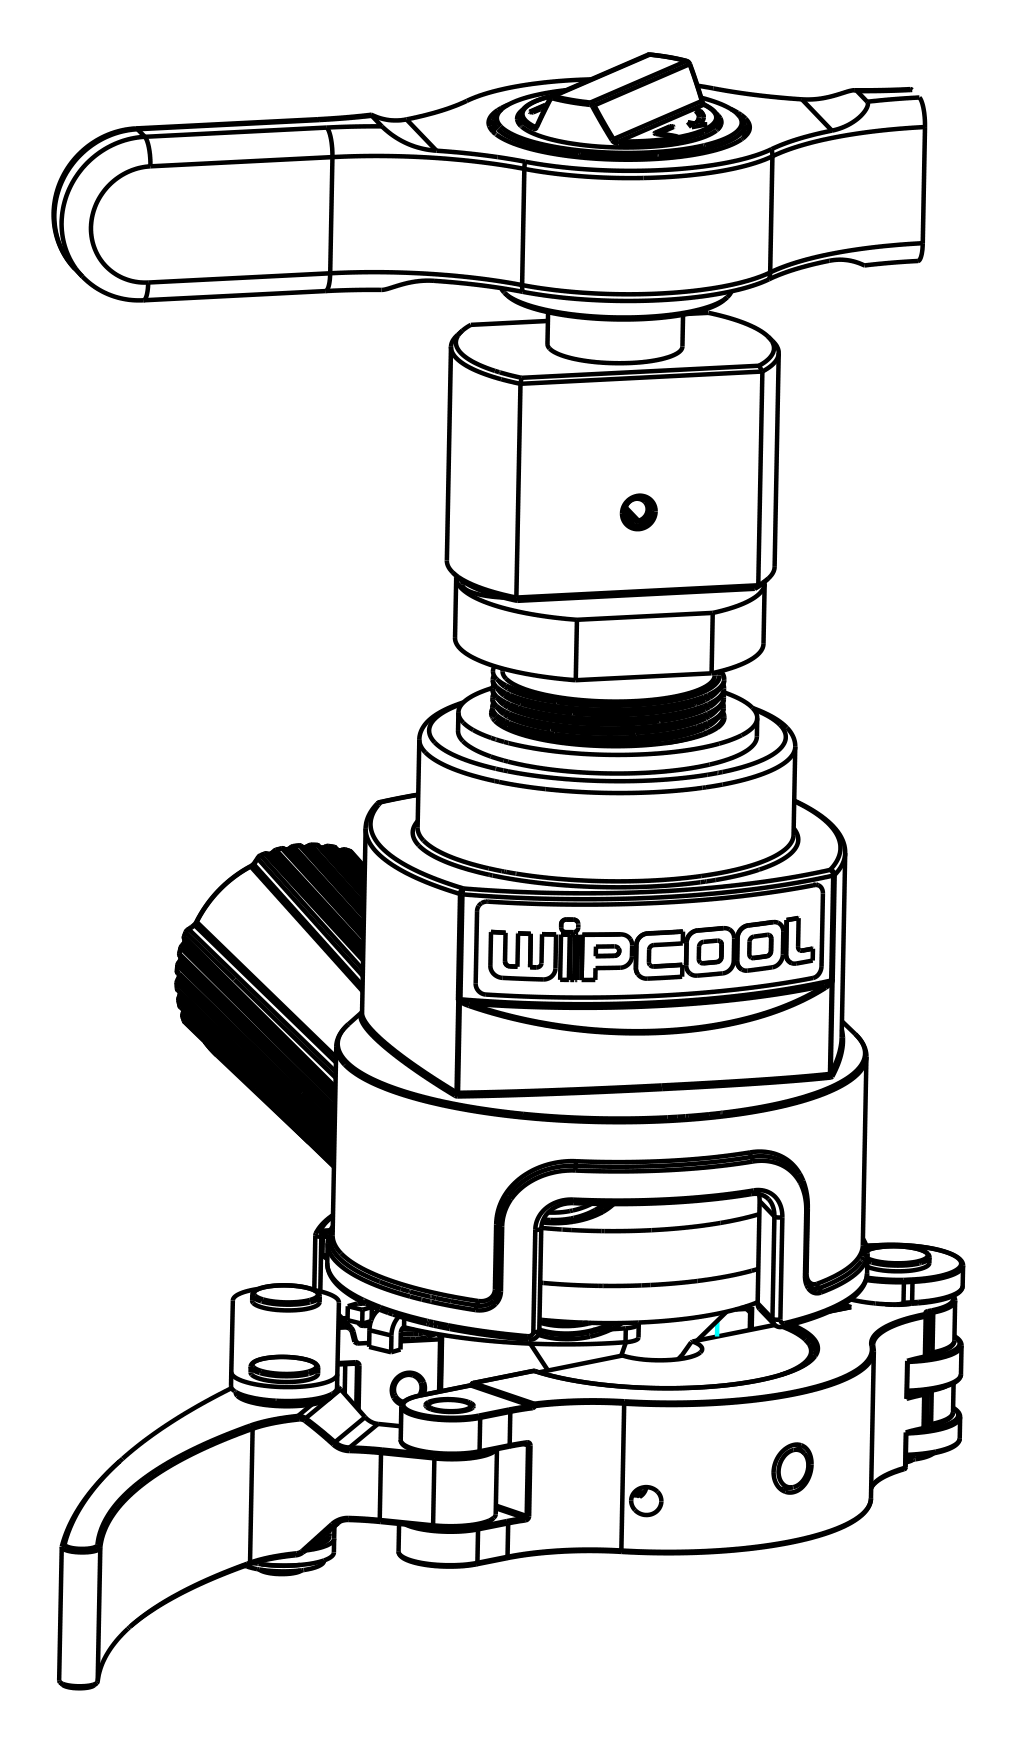
- 01Open the clamp by pressing its arms and insert the tube into the hole matching its diameter.
- 02Use the side stop to set the tube insertion depth, then close the clamp. Check that the tube is securely held; incorrect positioning may damage the tube or tool.
Manual flaring
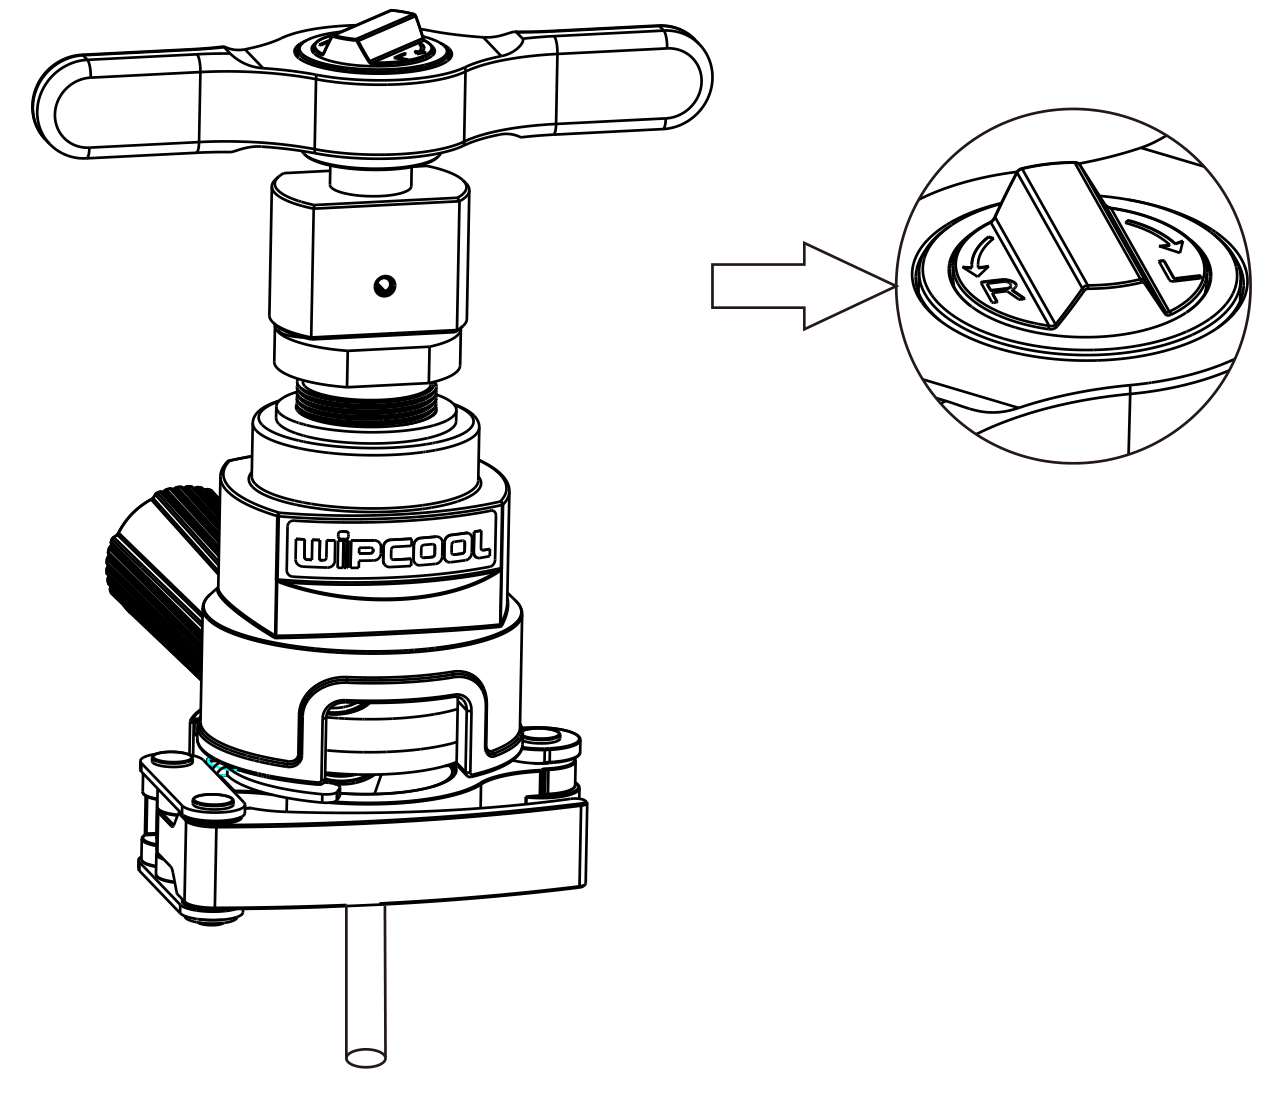
- 01Set the ratchet mechanism switch to position R (flaring) and turn the ratchet lever until you hear the drive screw release.
- 02Turn the ratchet lever a further three revolutions.
- ■3. Set the switch to position L (retraction) and turn the ratchet lever until the flaring cones are fully retracted.
- ■4. Release the clamp and remove the tube.
Maintenance
General recommendations
Maintenance must be carried out by a person trained in operating the tool.
Maintenance procedure
- 01After each use, clean the three flaring cones with a soft, dry cloth, removing any copper filings. Also remove dirt from the clamp and moving parts of the tool.
- 02Check the condition of the clamp, ratchet lever and drive screw thread.
- 03Lubricate the pressure spindle and drive screw thread regularly.
- 04Check that the ratchet mechanism operates smoothly and check the movement of the flaring cones.
Troubleshooting
| Problem | Possible cause | Solution |
|---|---|---|
| The flare is uneven or incorrectly formed | Incorrect tube insertion depth | Set the insertion depth using the side stop. |
| The flare is uneven or incorrectly formed | Inaccurate positioning of the flaring cones | Check the position of the flaring cones. |
| The flare is uneven or incorrectly formed | Burrs on the tube edge | Clean and deburr the end of the tube. |
| The tube moves during flaring | Tube incorrectly secured in the clamp | Check that the tube is in the hole of the correct diameter and is securely clamped. |
| The flaring mechanism operates with excessive resistance | Dirty flaring cones | Clean the flaring cones. |
| The flaring mechanism operates with excessive resistance | Lack of lubrication | Lubricate the pressure spindle and drive screw thread. |
| The flaring mechanism operates with excessive resistance | Dirt in the drive mechanism | Clean the accessible working parts and lubricate the pressure spindle and drive screw thread. |
| The flaring cones do not retract properly | Incorrect position of the ratchet mechanism switch | Set the switch to position L and carefully retract the flaring cones. |
| The flaring cones do not retract properly | Mechanism jammed | Stop work and do not use the flaring tool. Have it repaired by the service department - submit a service request at wipcool.pl/serwis. |
| Difficulty changing the flaring size | Dirt in the size adjustment mechanism | Clean the accessible parts of the mechanism and check the operation of the two buttons at the bottom of the tool. Do not use excessive force. |
| Difficulty changing the flaring size | Incorrect setting of the size adjustment mechanism | Check the operation of the two buttons at the bottom of the tool. Do not use excessive force. |
| Mechanism damaged or overloaded during drill operation | Excessive torque applied | Stop work and check the condition of the tool. Use a torque setting of 12–15 Nm. |
If the steps described do not resolve the problem, do not use the flaring tool. Have it repaired by the service department - submit a service request at wipcool.pl/serwis.
Service and documents
Before submitting a service request, prepare:
- ■Model - shown on the product label and on the invoice.
- ■Serial number - if there is none, provide the production number (e.g. 11/2025), usually found on the underside of the product.
- ■Proof of purchase - an invoice or receipt from an authorised distributor.
- ■Description of the fault - what is happening, when it started and under what conditions.
You can submit a service request at wipcool.pl/serwis. You will also find the warranty terms there.